Bountiful Landscapes & ConsultingTransforming People & Places to Create Vibrant Health & Beautiful Outdoor Spaces
|


|
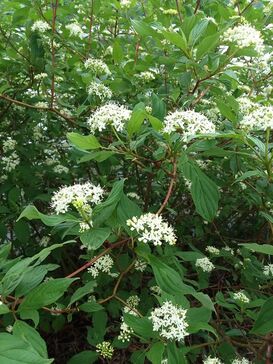
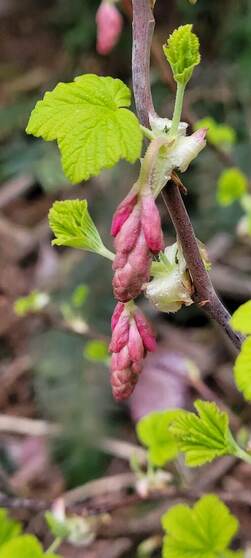
I love these early spring blooming shrubs! They make me feel like summer is actually coming!!! I am going to talk about pruning a Rhododendron. Mostly because so many people have them, and they are also very forgiving with pruning. Lilacs and Forsythia can also be pruned semi-aggressively, as needed.
 New growth can appear quickly after blooms have died. NEW GROWTH is where the blooms will appear next year! That's why you want to trim right after bloom so that the plant has time to grow enough before the fall! Make sure you prune the plant back far enough so that it maintains an appropriate (for you) size for a couple of years. I prune all my flowering shrubs every other year - alternately - so I choose one shrub per year to reduce. Super Simple! However, if you want help, you know where to get it :) Contact Me!  Pruning doesn't have to be fancy, it just has to be done! Ideally, you would take out all the dead branches from the inside out. This increases airflow and plant health. If you're not sure about timing and you want to practice a little, just prune a few branches then wait a week. Keep doing this until it looks like you want it. The next time it will be easier!!
0 Comments
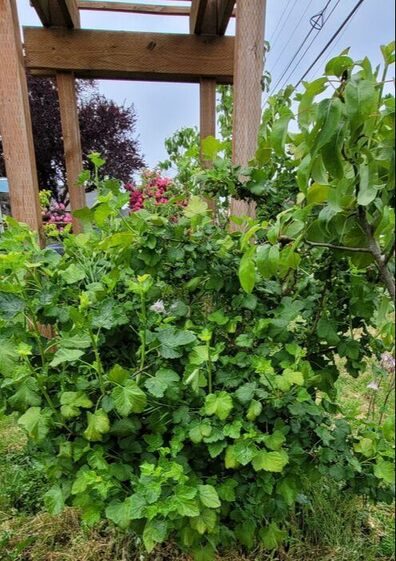
If I deem these aspects undesirable, I can use Arborist chips, AKA wood chips, to manage them. For sure there's opposing opinions about using cardboard underneath, but let's not discuss that now. We'll talk just about the benefits of using the chips. The bottom line is that covering the ground stops photosynthesis, and that stops plants from growing, whether you call them weeds or not.
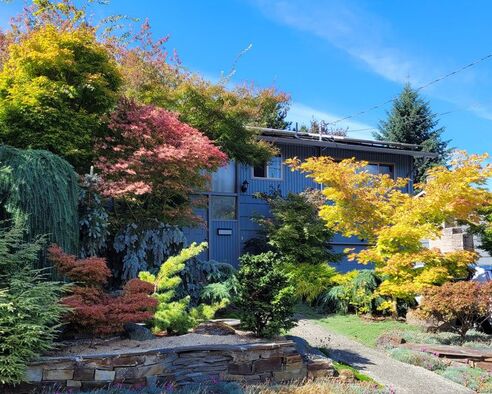
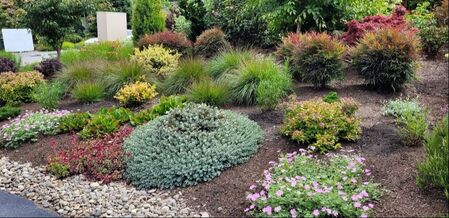
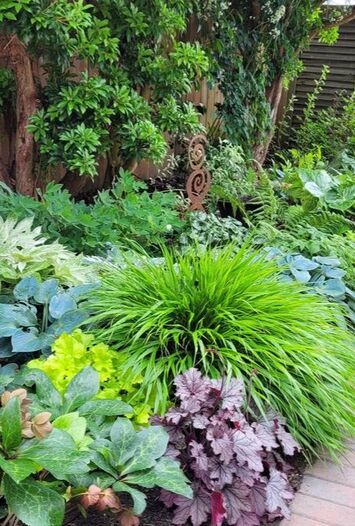
Over a couple of years, as the chips decomposed, I scattered native flower seeds that I got from others. I just wanted to see what the landscape would grow. Before this, it grew almost nothing in the crappy clay soil. I noticed that some things grew, and others didn't. But I got a lot of information about the environment, and more things grew as I learned. Here's a picture of my current spring yard. It grows everything now!!!  This is how to get the most beautiful and timely Arborist Chips for your next project! https://getchipdrop.com/ Here's how I write my request – modify your request as needed. Make sure to include a picture of the area. It's best to order them right after a fall or spring storm, that way you get "windfall branches." Otherwise, summer drops tend to have more invasives and diseased tree debris. "Please dump chips in driveway on top of tarp. NOT up against garage doors & NOT into street. Prefer Hardwoods, but some evergreen is OK - CLEAN ** NO INVASIVES PLEASE** and very little pine needles if possible. Thank YOU!!!"
Happy Mulching!
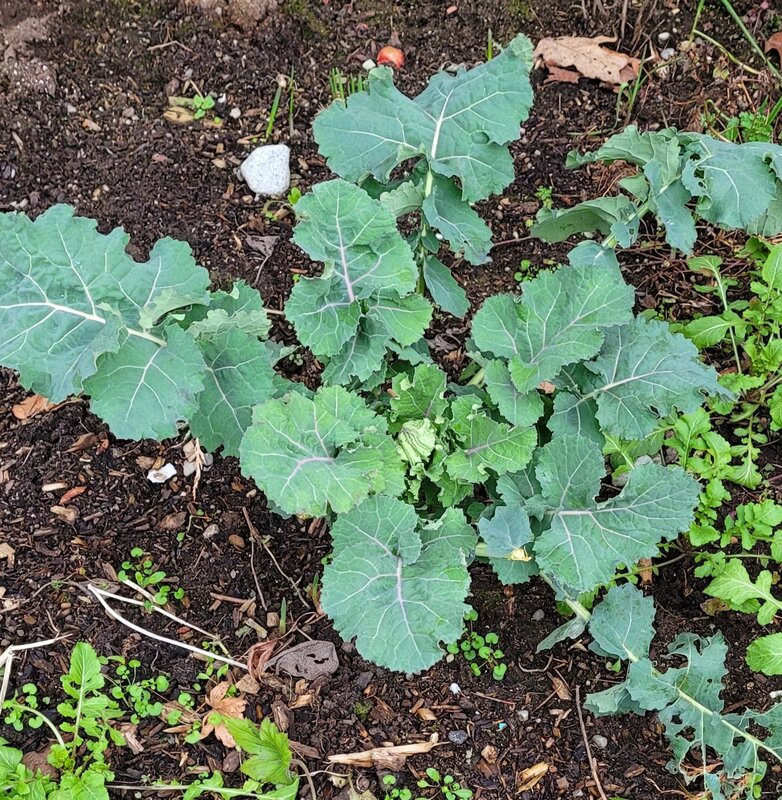
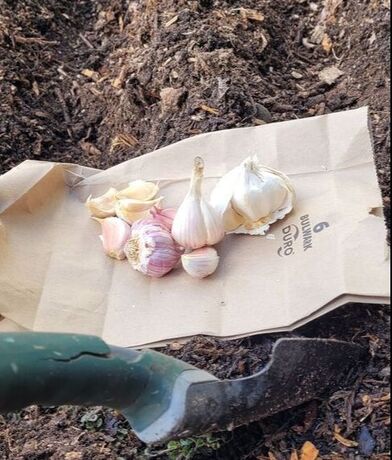
Planting, harvesting, and scapes.One of the questions I hear the most..... "Is it too late to plant my garlic?" insert a bunch of laughing emojis here! We ARE garlic lovers!! :) Now, we can get quite technical about what/how/when - and there are definitely times for that. But, I want to encourage more people to grow the food that they love! So, here are a few tips on growing garlic for the novice gardener: 1. Use ONLY organic garlic. You can buy the bulbs from a nursery or from your high-quality grocer, but make sure the bulbs are tight and hard, ie. fresh. If you use grocery store garlic, the grown bulbs may not get as big. 2. Know the two basic kinds - hardneck and softneck. If you like the garlic you usually get at the store, that's probably softneck. It's not cold-hardy, but you can easily grow it in your yard. It has a mild flavor. Hardneck varieties are cold-hardy, and they produce tall twirly scapes that you can harvest in the late spring while the bulb matures. The scapes are great to use in a stirfry, and the bulb flavor is much more bold.
Adding Dimension to your Landscape
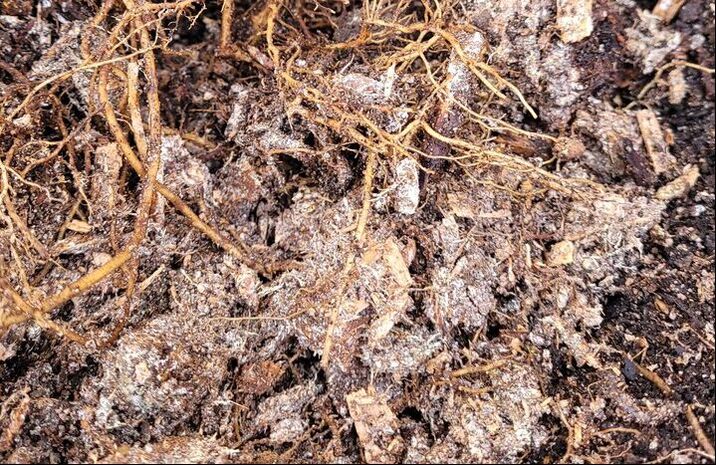
A note about mycelium.
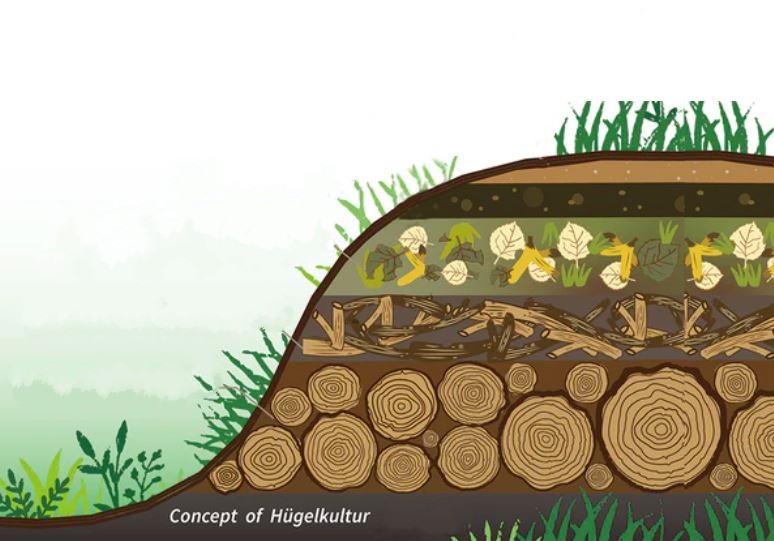
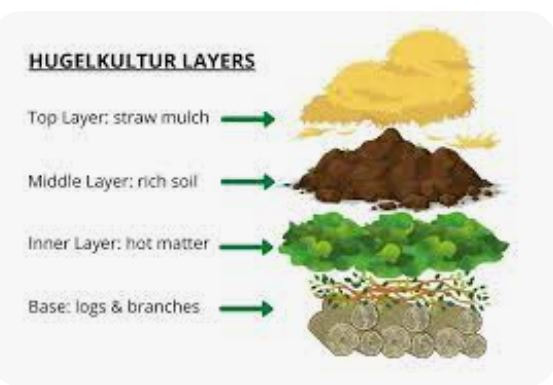
Hugelkultur - transform your gardens!
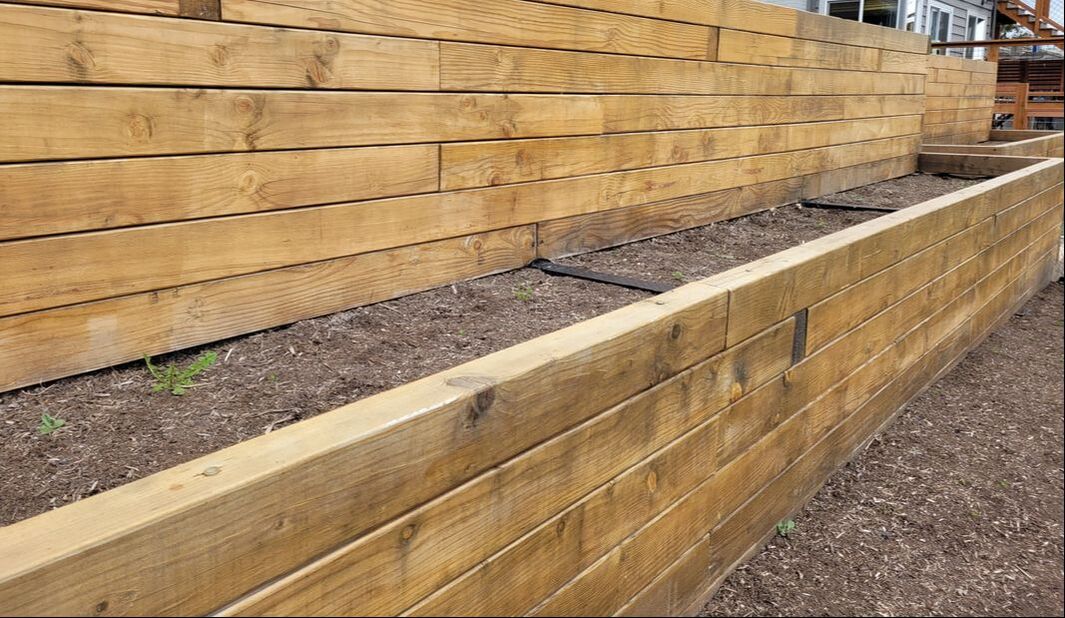
Hugelkultur is a landscape technique constructed that effectively transforms clay, compacted or wet ground into a usable plantng area, that also absorbs excess ground water. It's great for that yard that won't grow anything!
A Hugelkultur not only soaks up excess ground water, but it provides a microclimate as a raised planting bed for trees and shrubs as well as perennial flowers, herbs and veggies! You can tame a wetland, absorb water, create dimension and grow healthy plants!
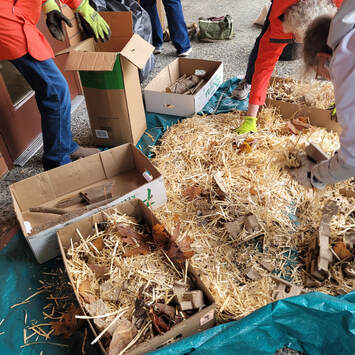
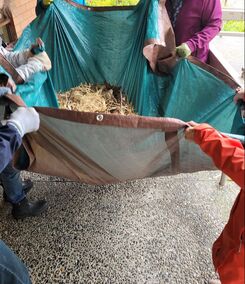
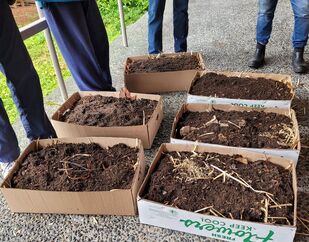
Planter - in - a - box! This is a recent workshop I did where participants created a planting bed with the hugelkultur layering method. Afterwards, they took the boxes home and "planted" them. The perennial flowers they planted will grow in the spring with the help of this specialized hugelkultur microclimate planting bed!
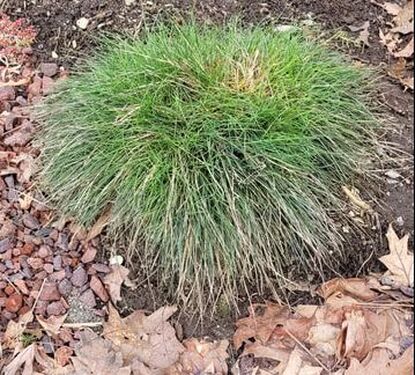
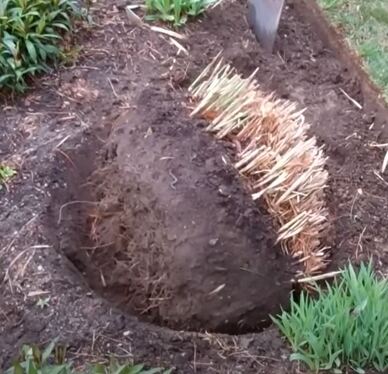
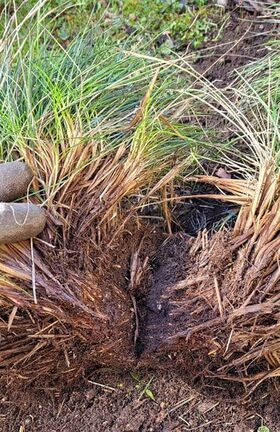
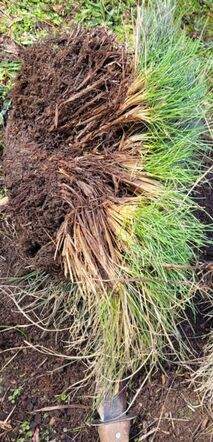
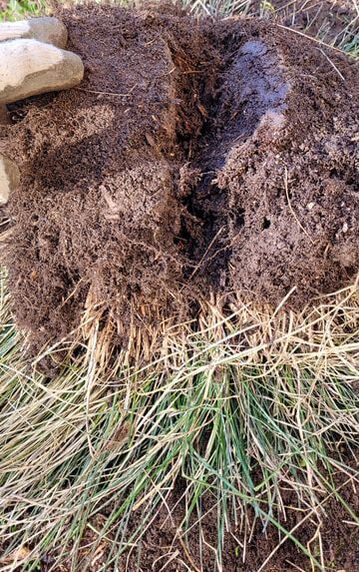
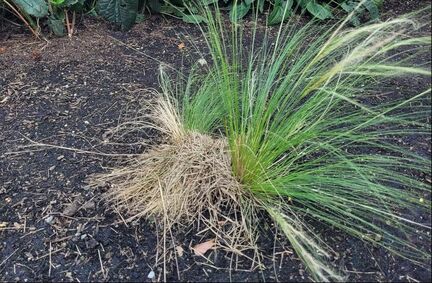
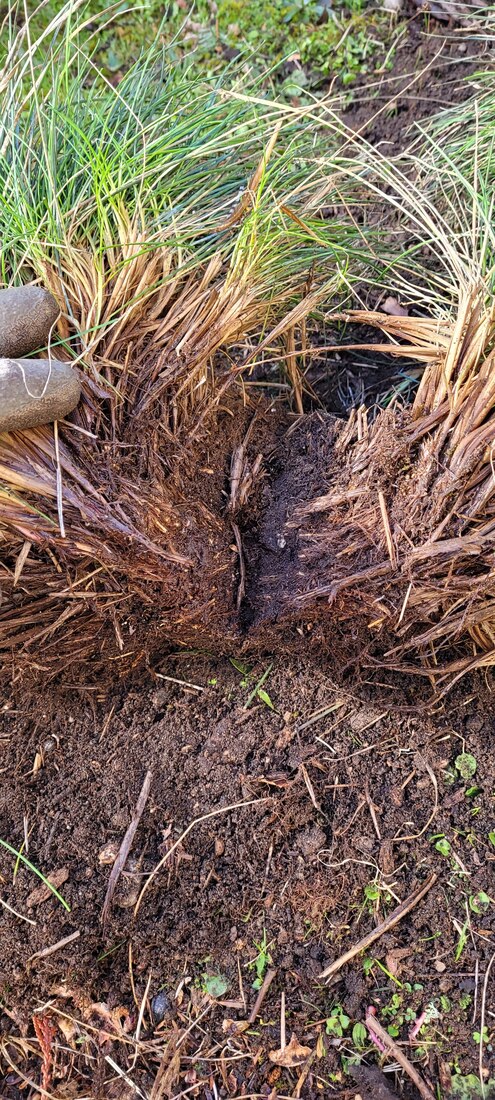
This has got to be my BIGGEST pet peeve in gardening..... And you wonder why grass plants die. 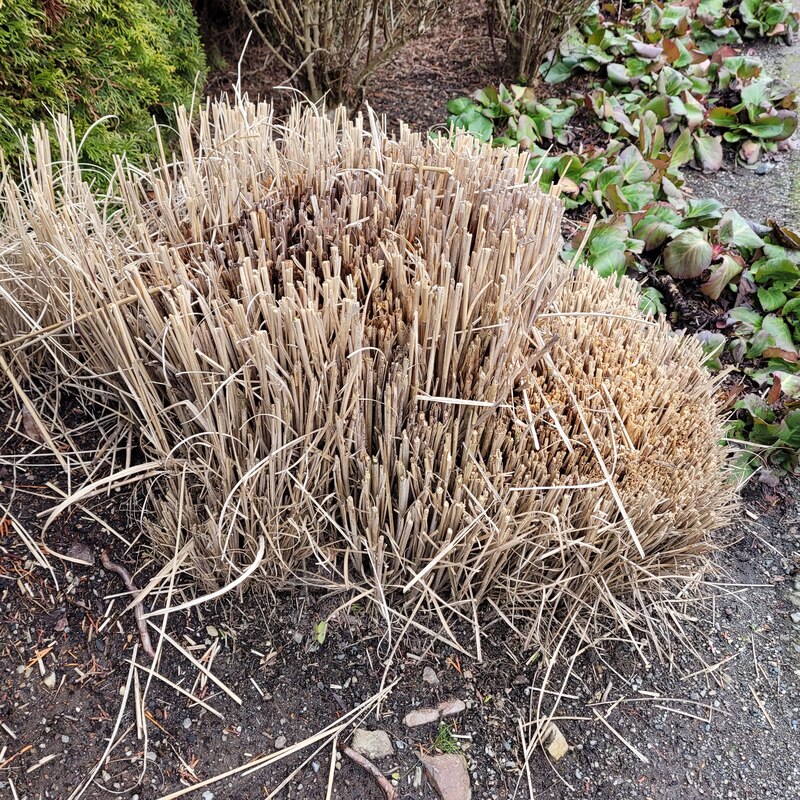 Think of grass plants like hair It grows from the roots, but people always cut it like it grows from the ends!!! UGH Many want to trim their wildly growing grasses during the "clean-up" time in the fall. You can - but not like this! If you can wait, prune in February, just before spring growth. But, if you must do it in the fall, follow these tips! I like late fall pruning of my grassy plants because it gives them time for new growth before the heavy rains come. AND, it tames the wild! August 1st - BEFORE 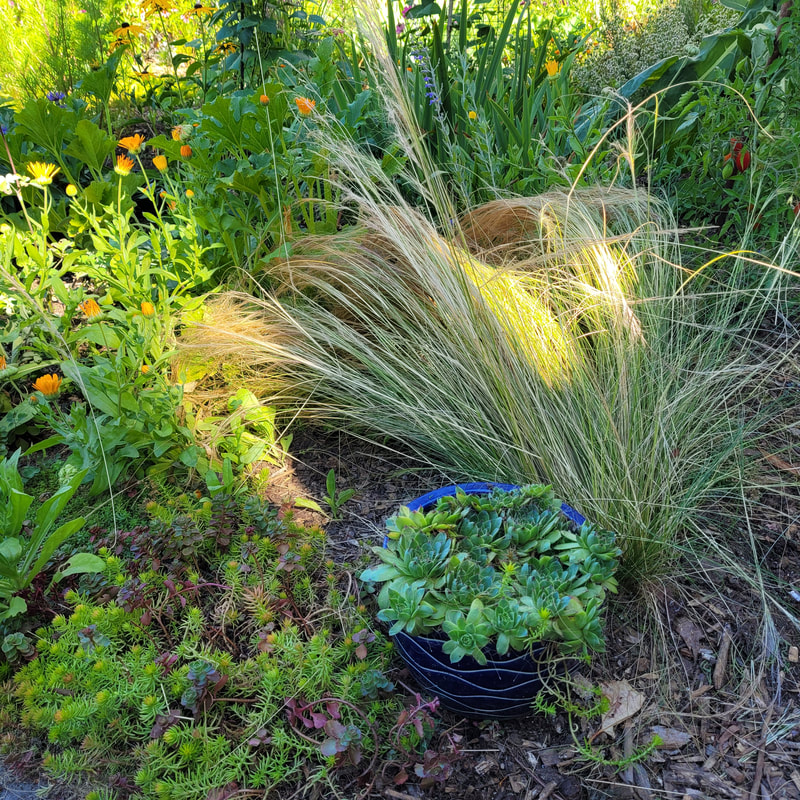 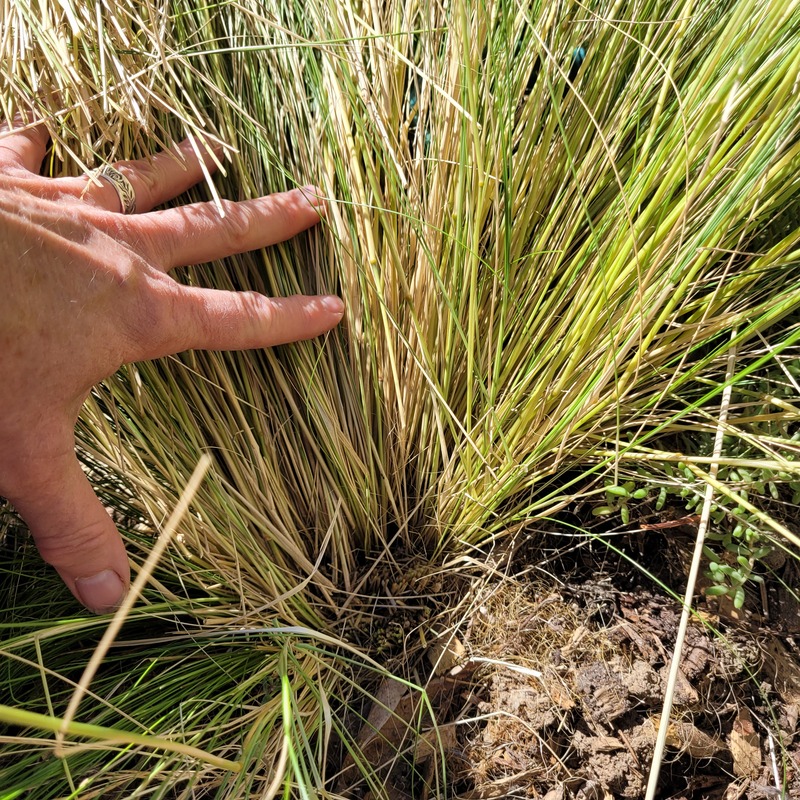 Yes, cut all the way to the ground! 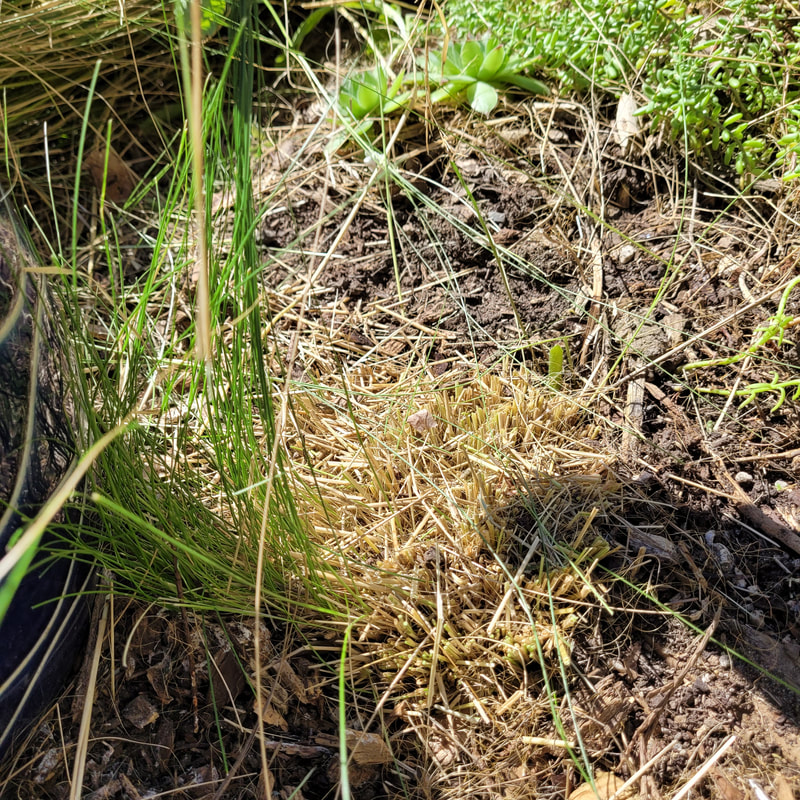 If the weather is still hot, give them some water. They will start regrowing right away! September 12th - AFTER 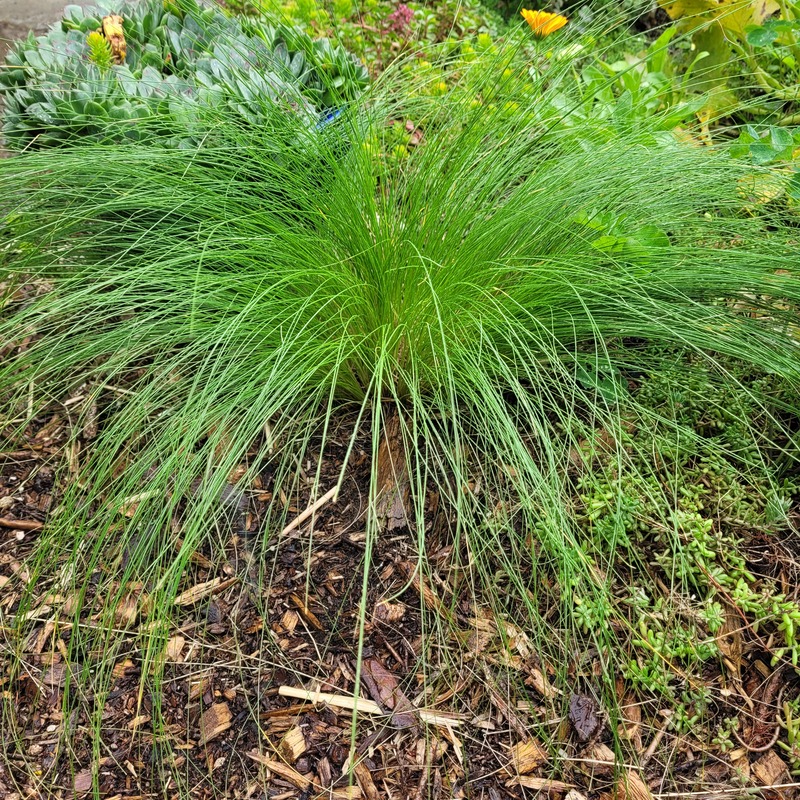 To trim during the fall "clean-up" Use: Sharp, Clean Tools!!! Thick gloves and a bungee cord or string to tie the plant up for easier cutting. 1. Use loppers first for larger cuts, then use pruners for shaping or smaller cuts. 2. Prune as close to the ground as possible. The lower to the ground, the sooner the new growth will appear. 3. To clean up smaller or evergreen grassy plants (fescue or oatgrass), Run your gloved hand through the plant, combing to remove dead leaves. Trim away dead undergrowth. Use this method for sedges as well. You can prune these plants the same as grasses, but they only need it about every 3 years. Dividing Grasses I find that when I trim & divide in the late summer or early fall, the plants have time to start regrowing before the dormancy period. Then, in the spring, it comes back at just the right size to start the growing season! If your grass plant or sedge has gotten too big, first, trim as above. Then divide it either in half or in quarters with a shovel. Just dig right into it, you won't kill it. They are hardy!!!!! Replant the sections to expand your gardens!
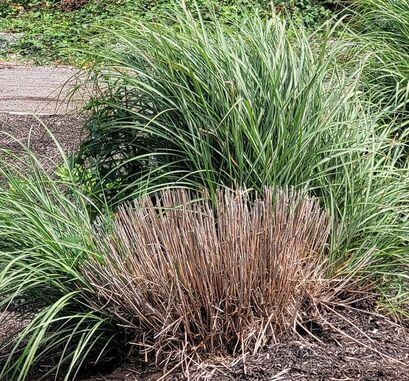
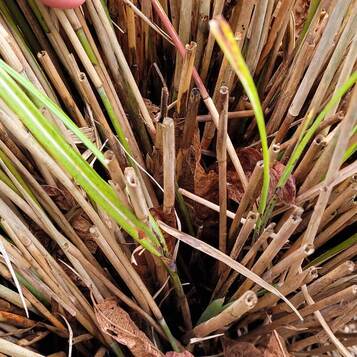
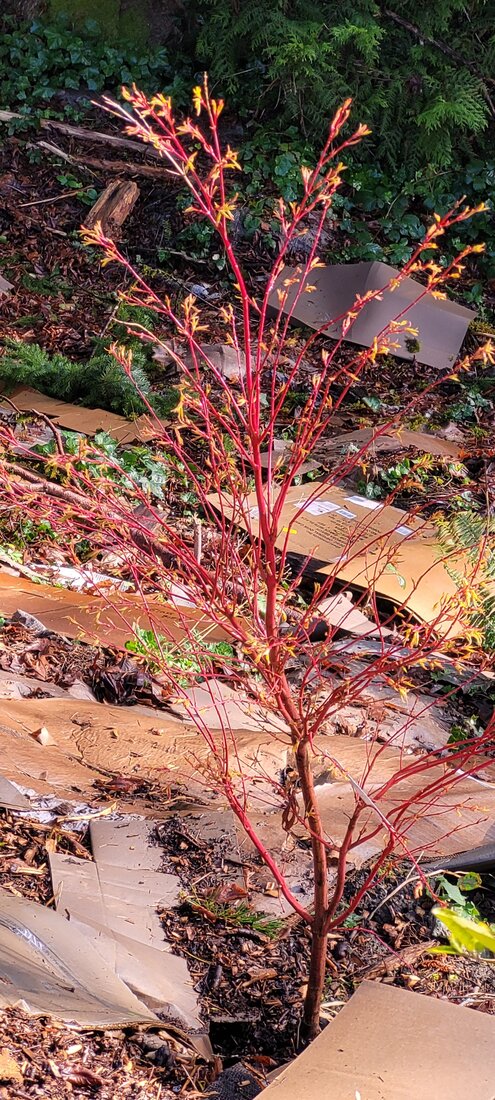
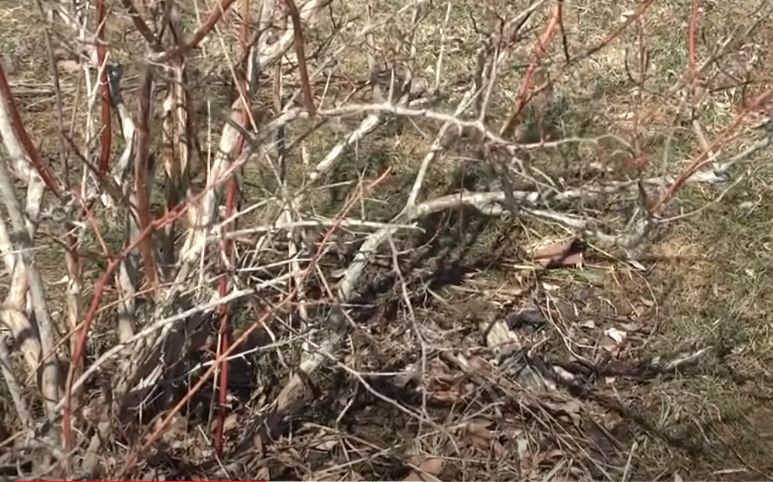
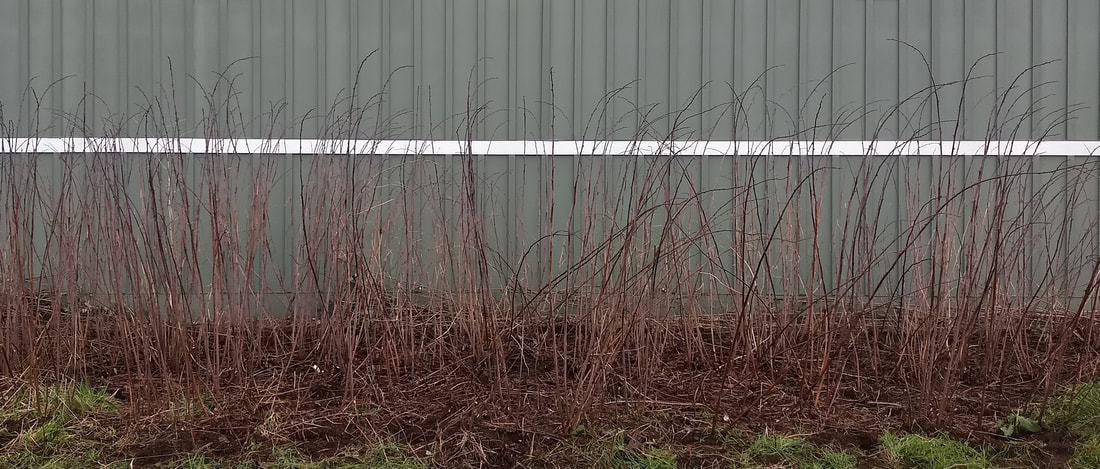
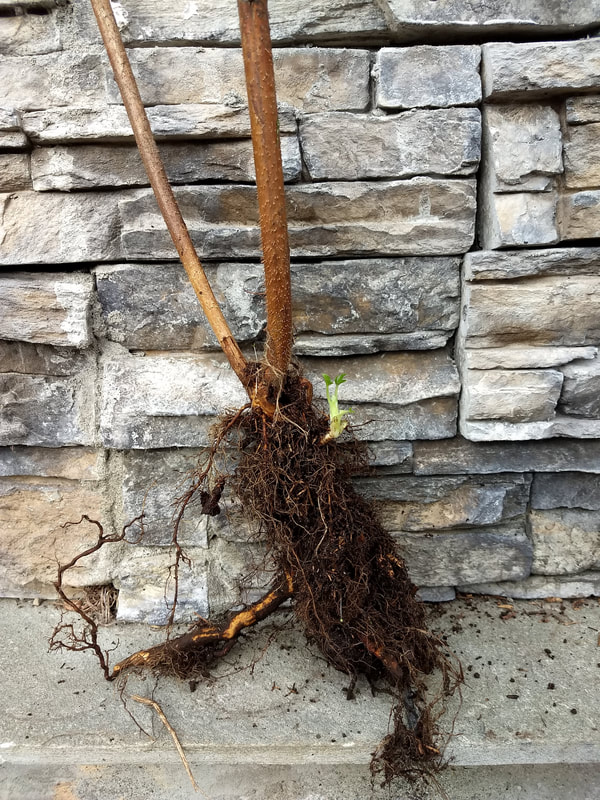
Are they Dead??
I see lots of plants that look like this! Either they are dead or they will come back unhealthy! This is beacuse the new growth that wants to come up from the root isn't getting enough light.
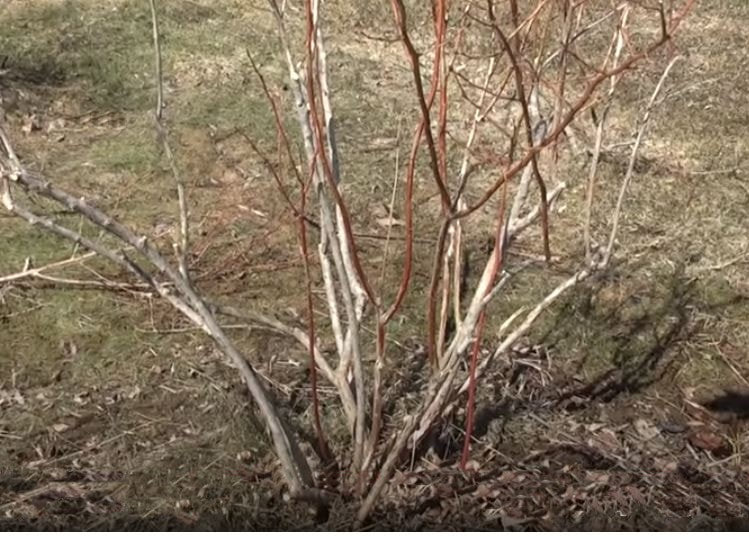
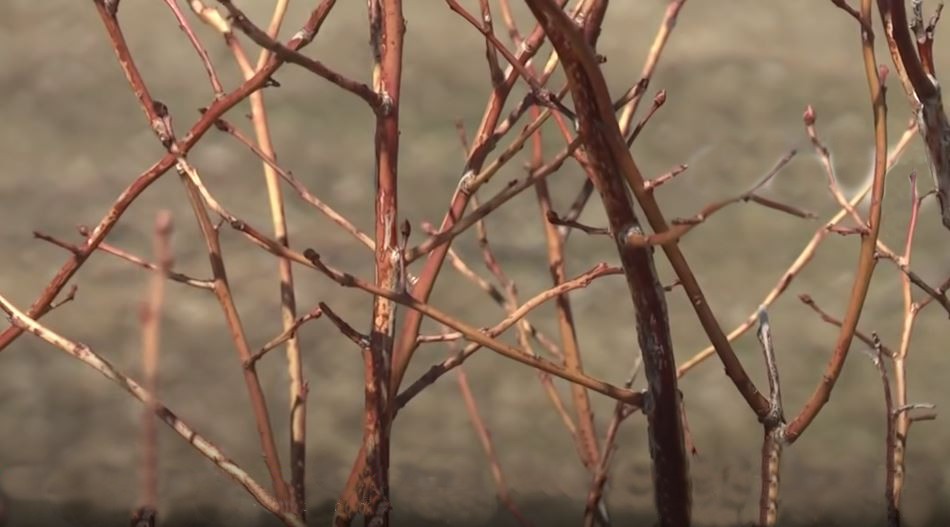
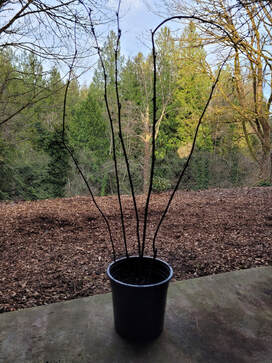
Trim in late winter
1. Cut back early enough before they start growing in the spring - before you see any green from the root. 2. Cut off as much dead growth as possible - to have a nice clean appearance during the summer.
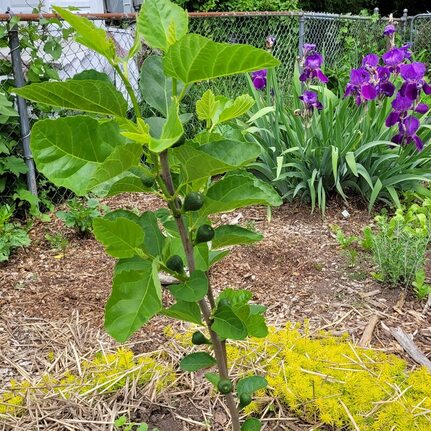
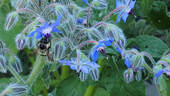 Many people don't want to plant flowers in their fruit orchards. And the trees suffer. I recently saw what could be a lovely orchard out at a country estate. A beautiful, but small orchard, and not a flower in sight. My question: "During the few days that any tree is in full bloom waiting to be pollinated, how do you think the bees will find it?" THINK ABOUT IT
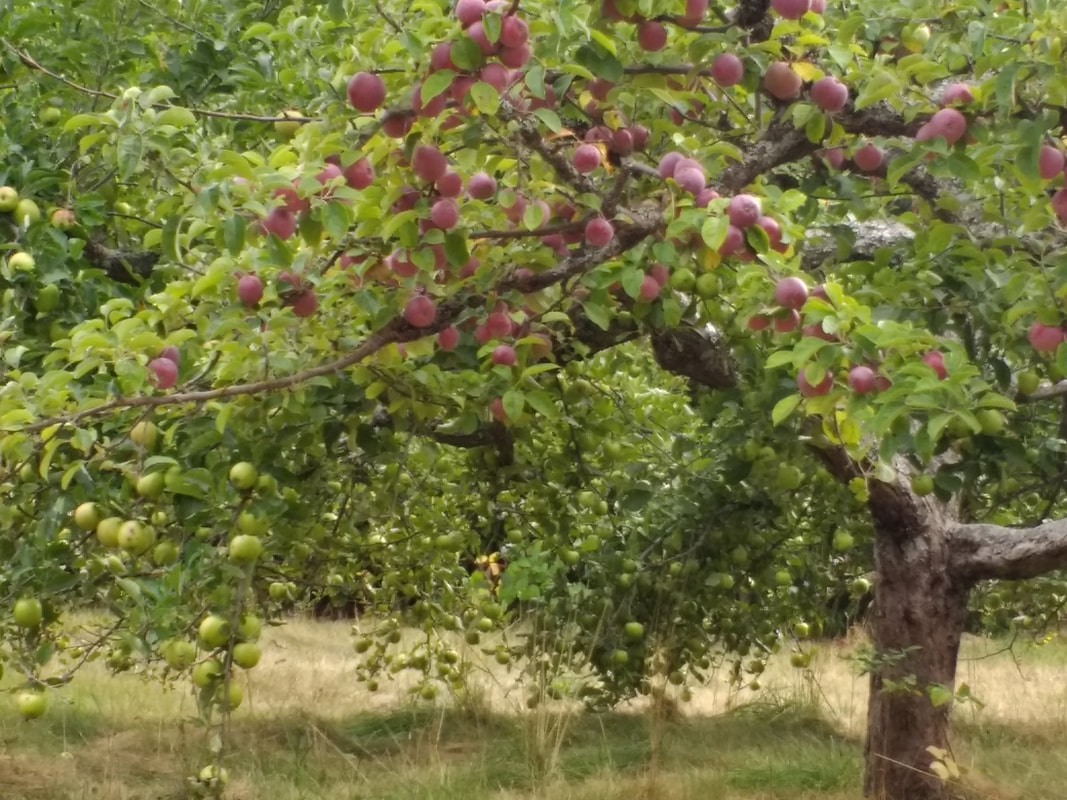 Spur fruit, such as apples and pears are frequently grafted to provide several varieties on one tree. This is beneficial because two different varieties are needed for successful pollination. An apple and a pear, two different apples, or two differnt pears are examples. This tree has two different varieties of apples on one tree - so this works! The bees can find both varieties easily!!
Many nurseries sell these multi-variety trees, which are grafted onto a "root stock" adapted to a specific location, such as Western Washington, where the climate is wet and more prone to disease and pests. It is important to pay attention to this adaptation because some less resilient trees and shrubs will attract disease and pests more easily, and spread them quickly to surrounding plants in your orchard and your neighbors. Orchard trees take a lot of care, and can produce abundantly for years! Please take care of them, and our local bee populations as well!
A Permaculture approach to design.Step 1 - Draw a simple map of the elements affecting your yard. Here's an example: 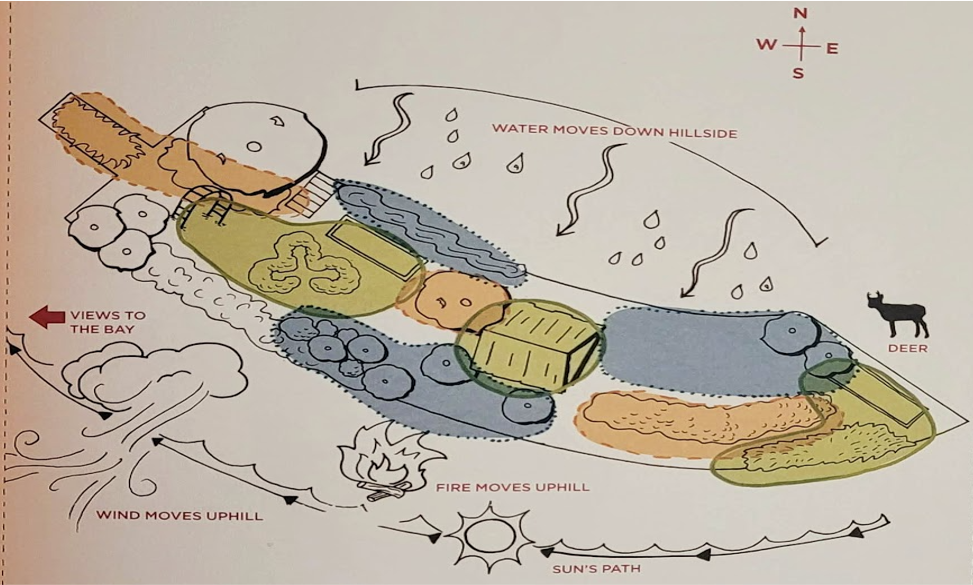 Step 2 - Identify potential planting areas for flowers & veggies - they can be integrated together!!
Step 3 - Note the location & type of trees, shrubs and other plants you have in your yard that come back year after year.
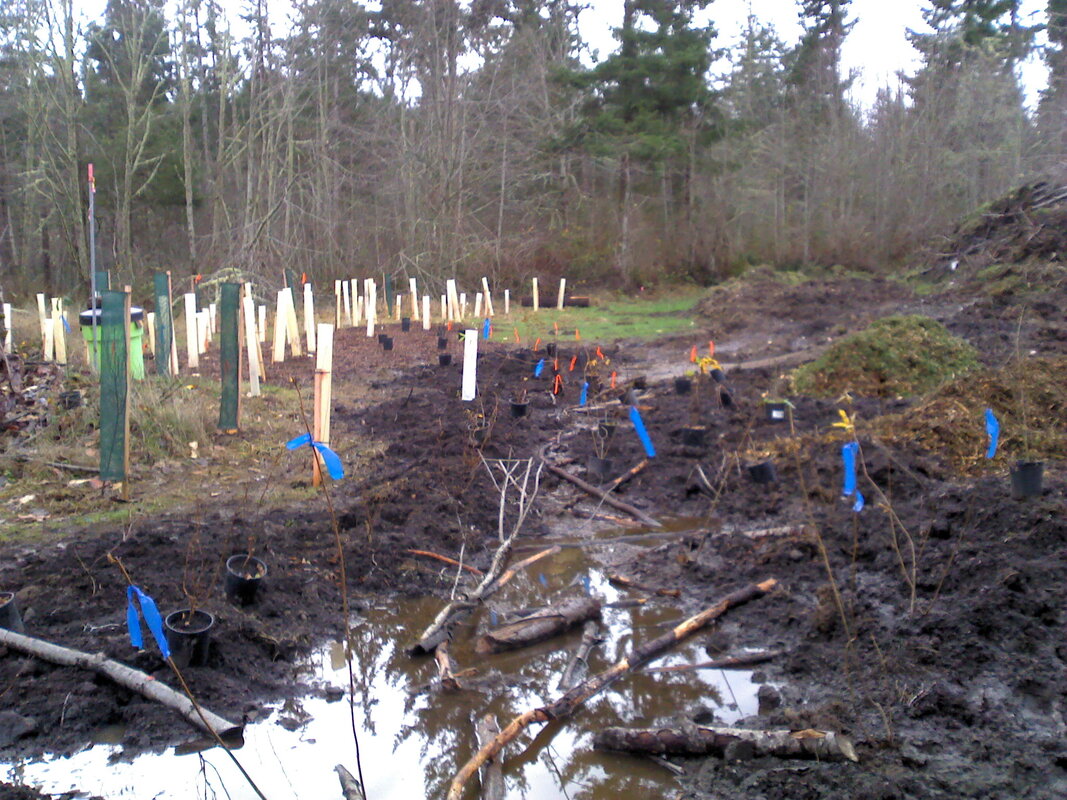
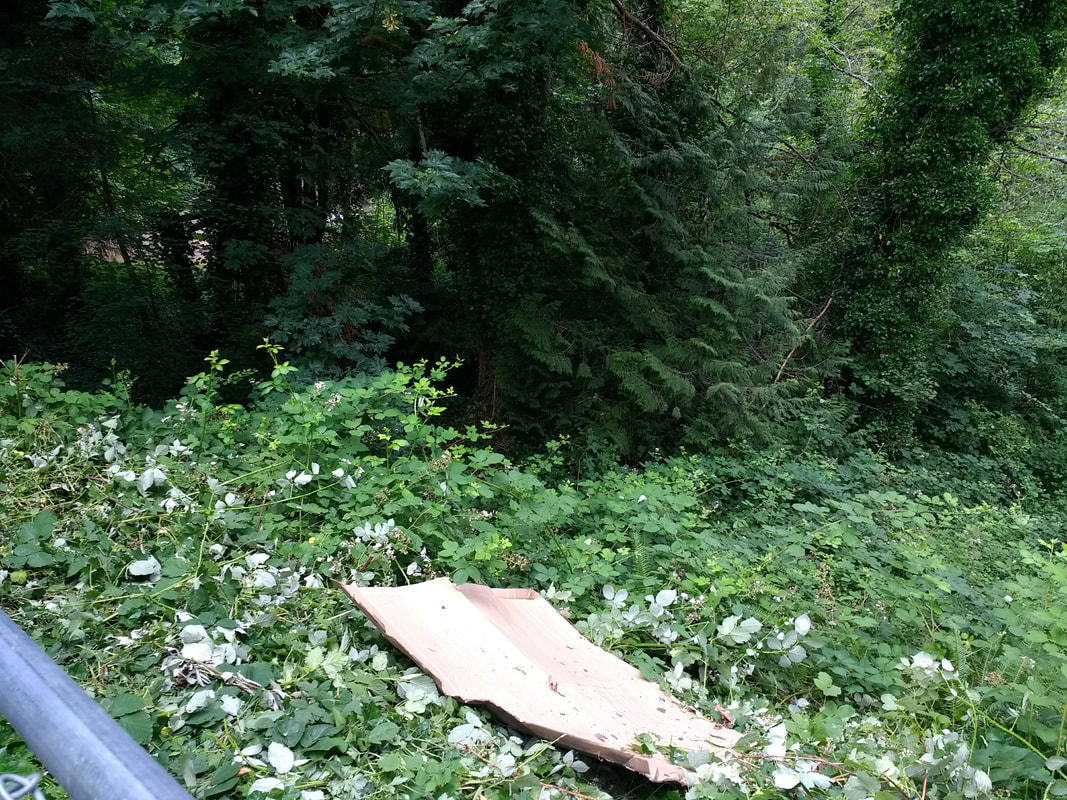
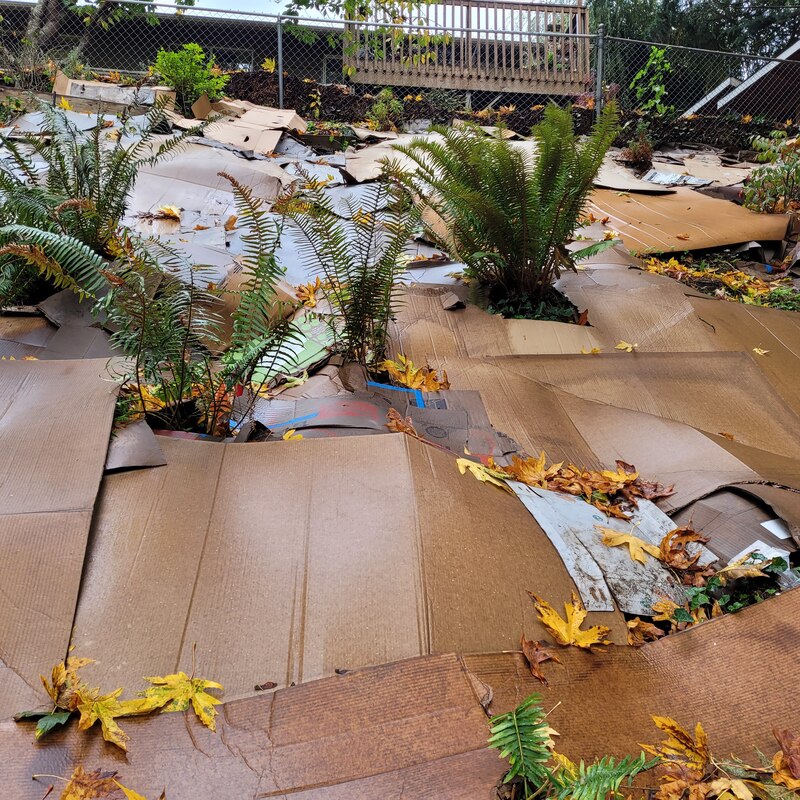
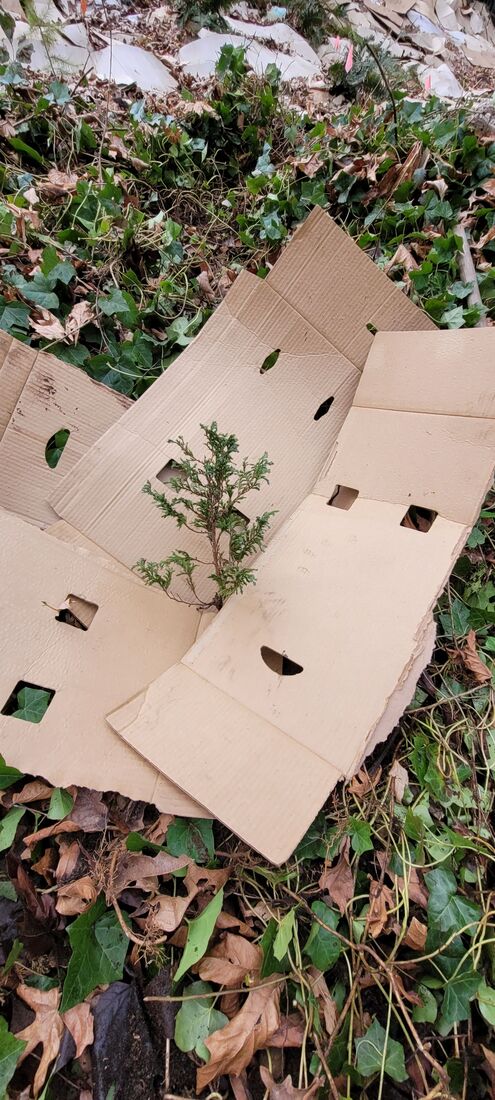
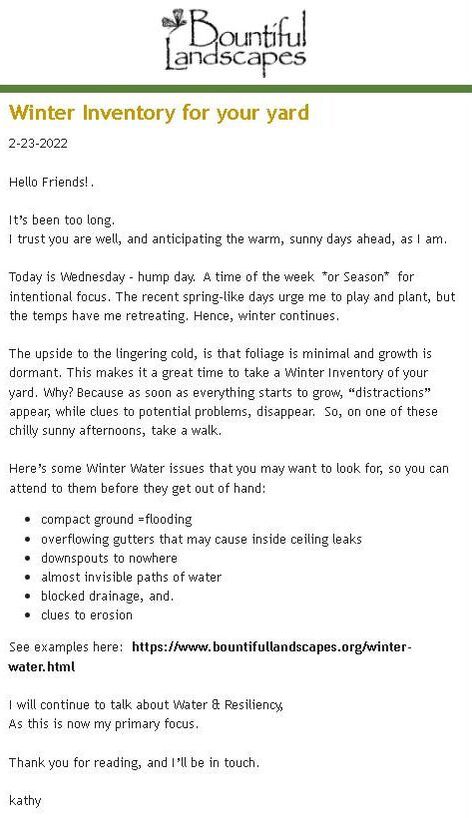
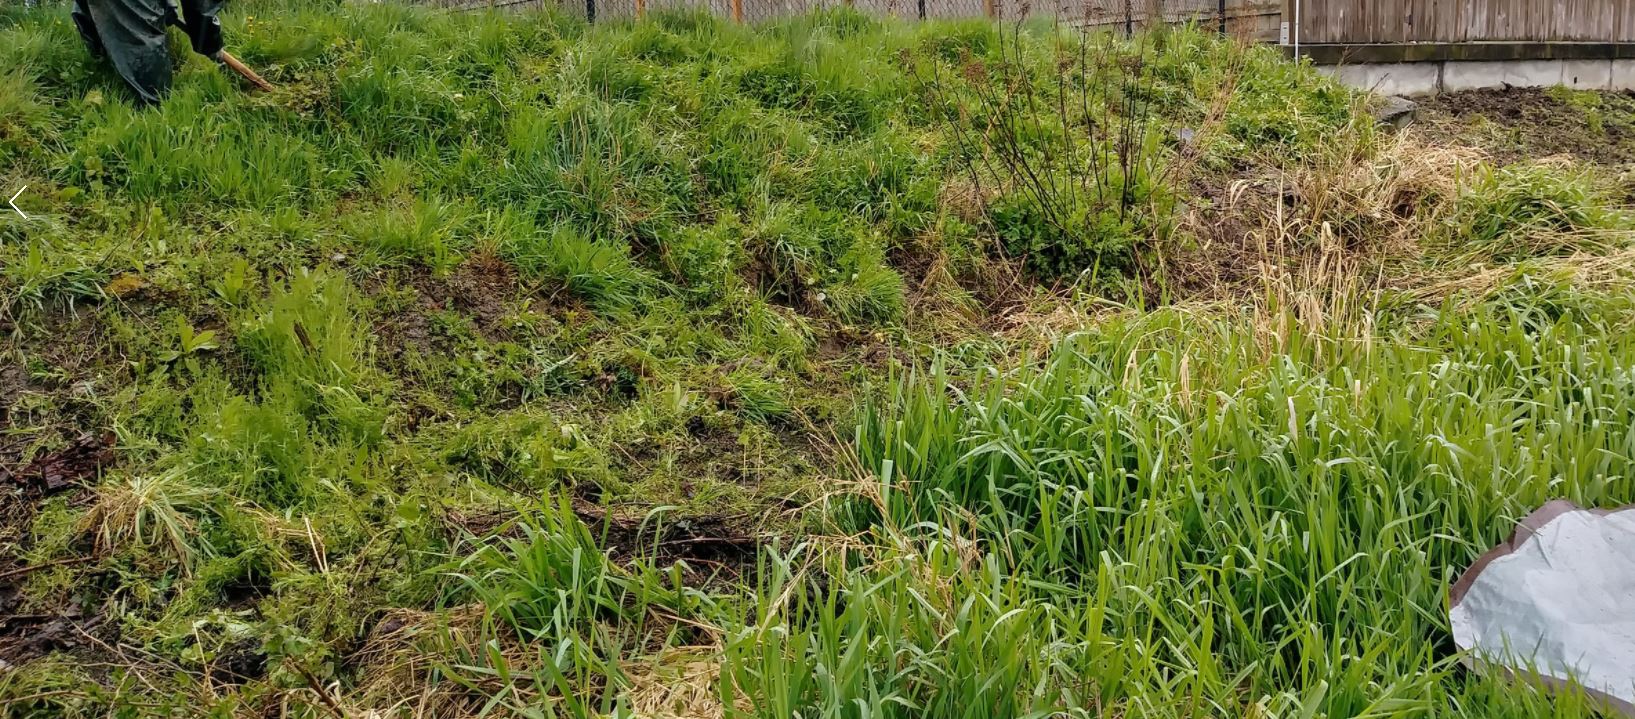
Review the different Layers of a landscape to help with planning. 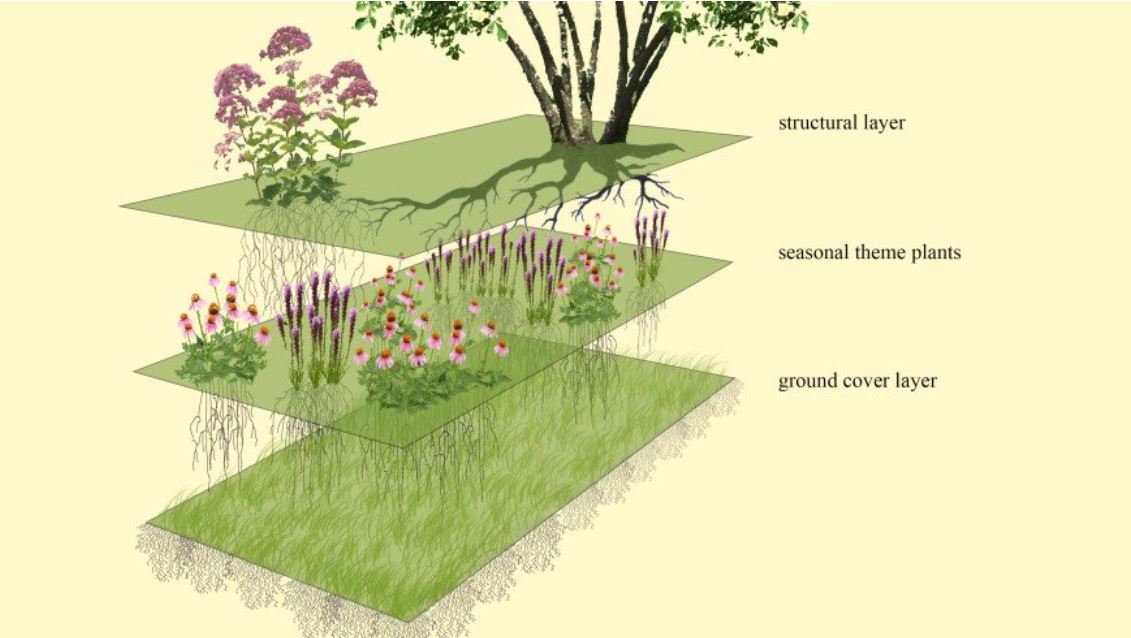 REMEMBER to FILL the planting beds to help retain water!! Then, add in unique landscape features to suit your personality! 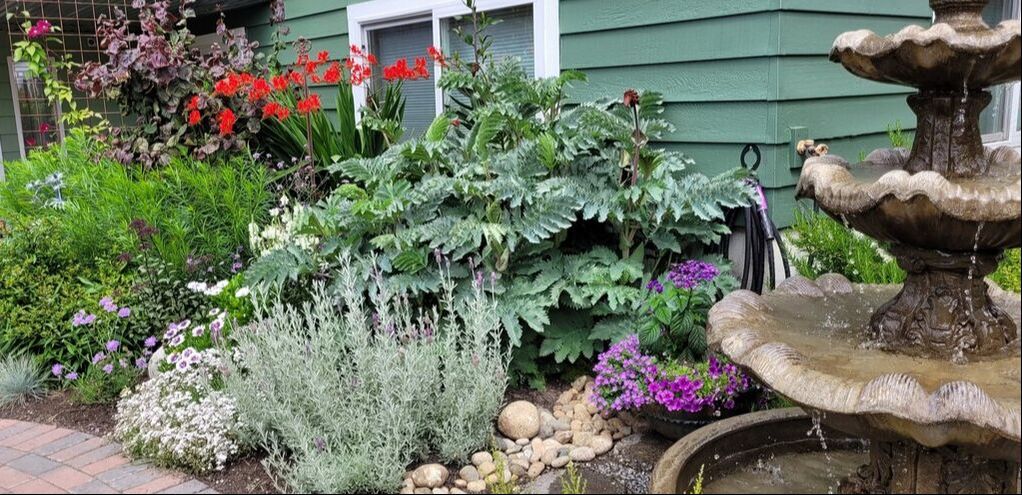 Have fun with different design ideas. Ask yourself, do you like a "tidy" or "messy" style?  Enjoy watching it all grow!!!  Taming the BlackberriesMy vision was to cover the "weeds" with cardboard, then add wood chips. This is what I tell people to do. I have done it a hundred times on large and small properties.

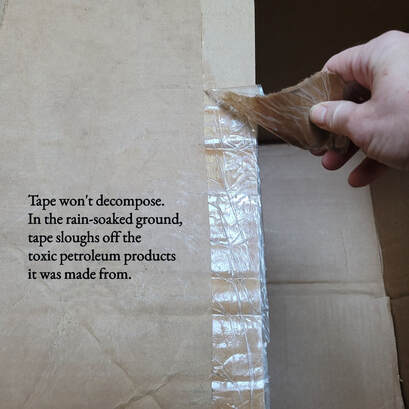
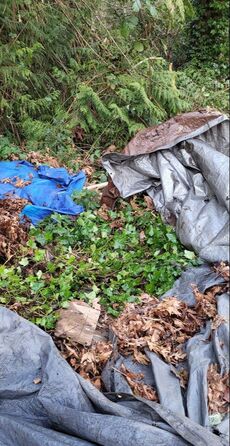
We worked hard to put in some logs for terracing and planted a few shrubs. 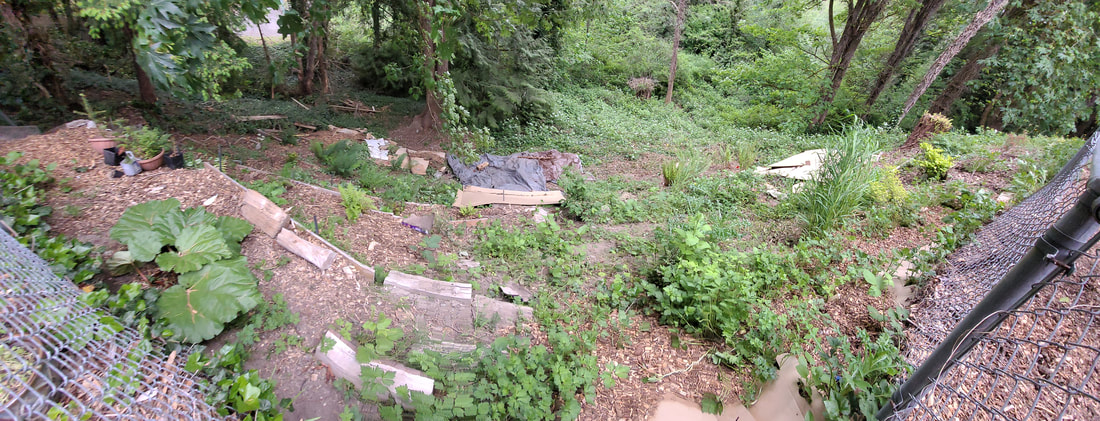 And then the rains came, And the blackberries got a BIG boost. 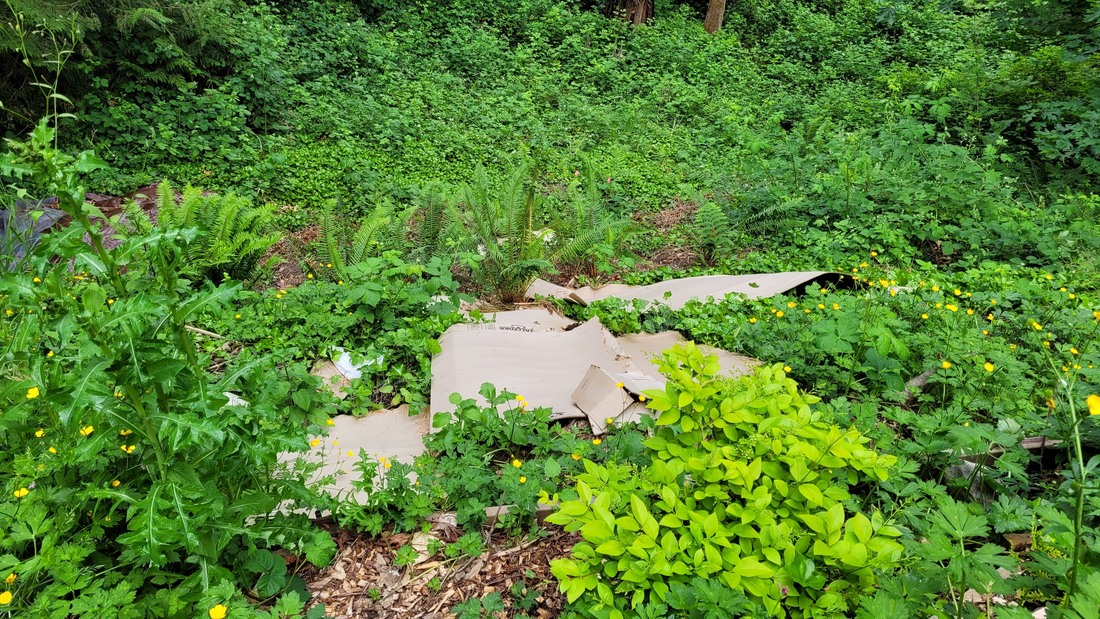 Year 3 One (popular) idea is to use a dark plastic tarp, to prevent photosynthesis which kills the weeds. SO, in the fall we put a giant tarp at the bottom of the slope and it stayed on from October until the next June. My father built greenhouses for a living, so I was skeptical of the tarp idea, (plastic with heat=greenhouse). So, I kept up with the cardboard on the top part of the slope. Then the leaves fell and the winter came. 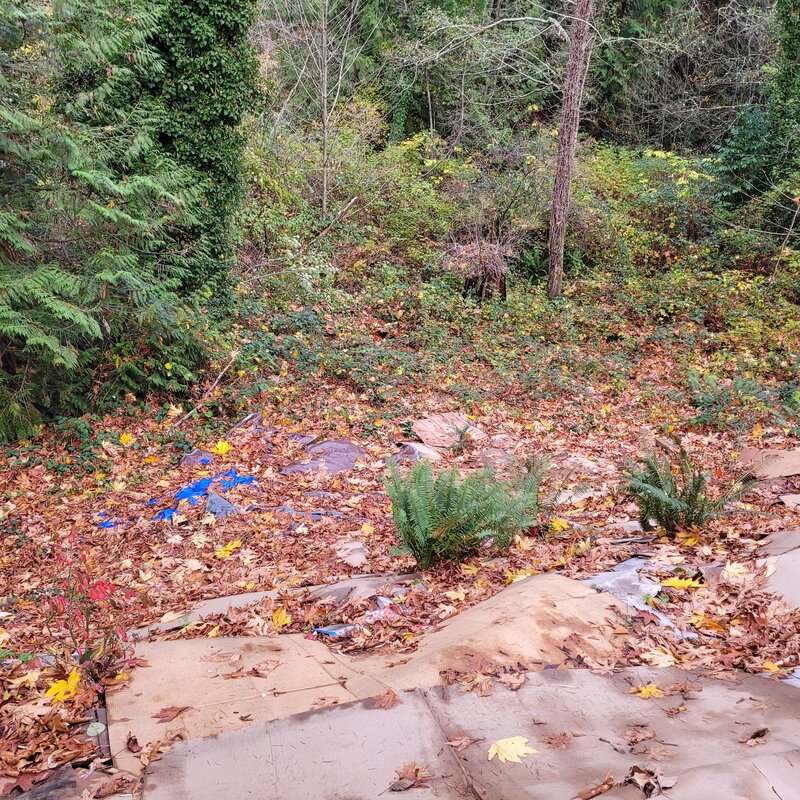 Then early in the year cardboard again, then wood chips to hold the cardboard down.
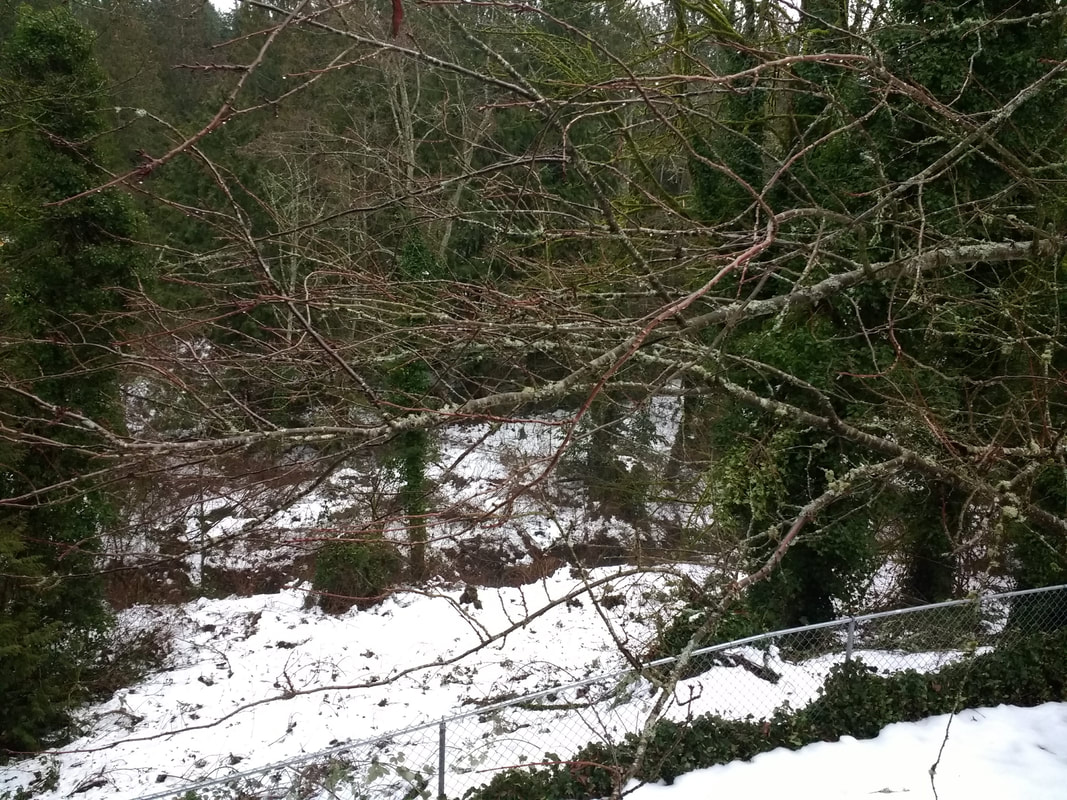
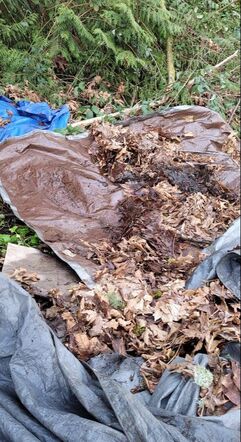
And now to check on the weed suppression tarp method!
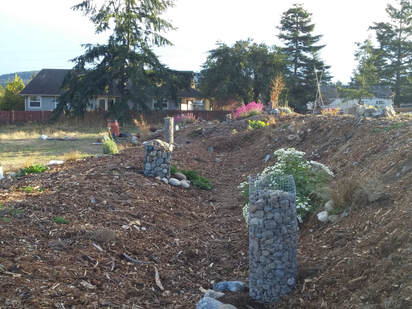
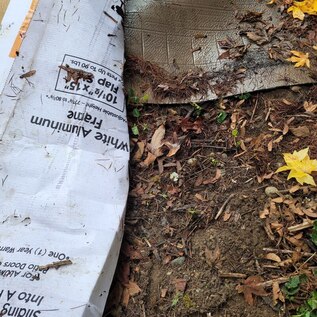
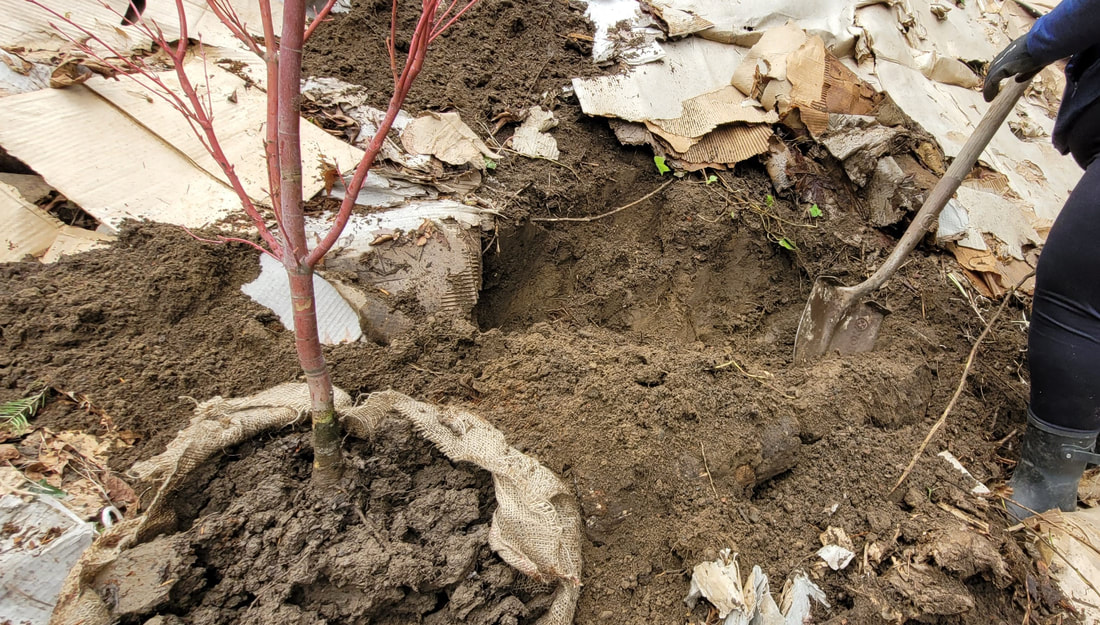
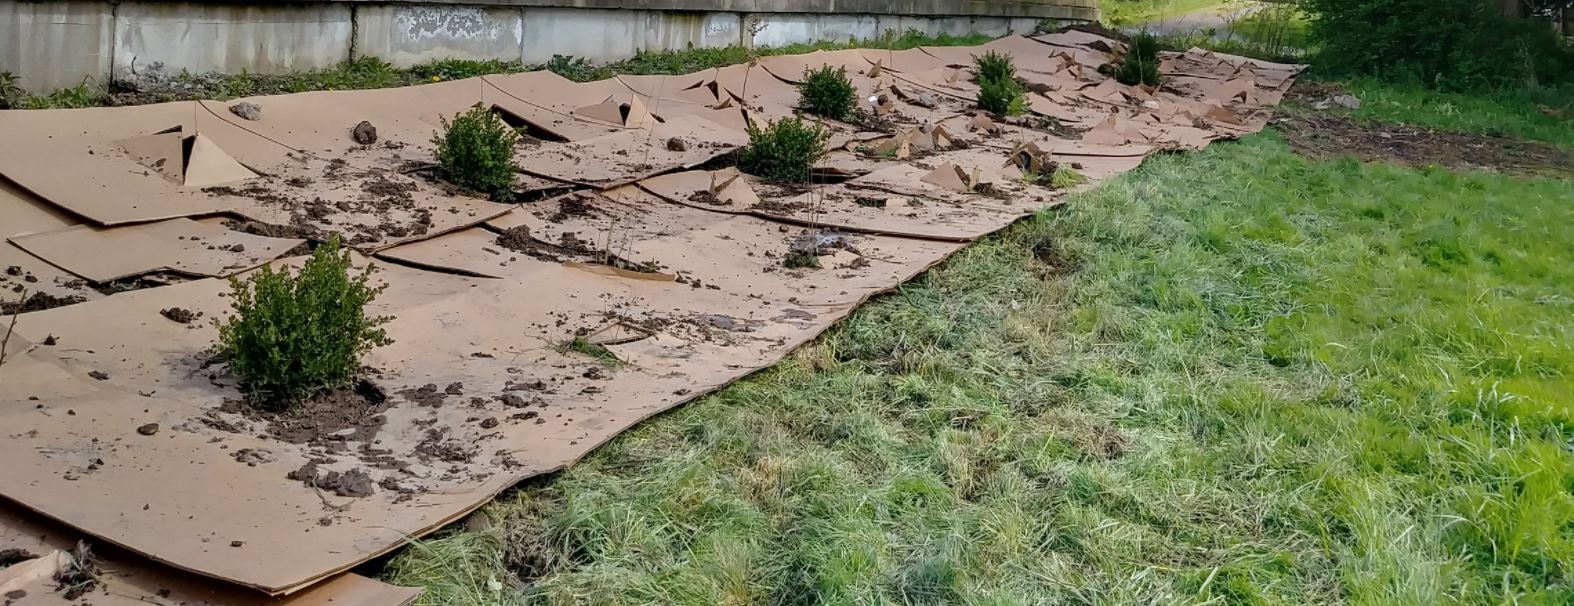
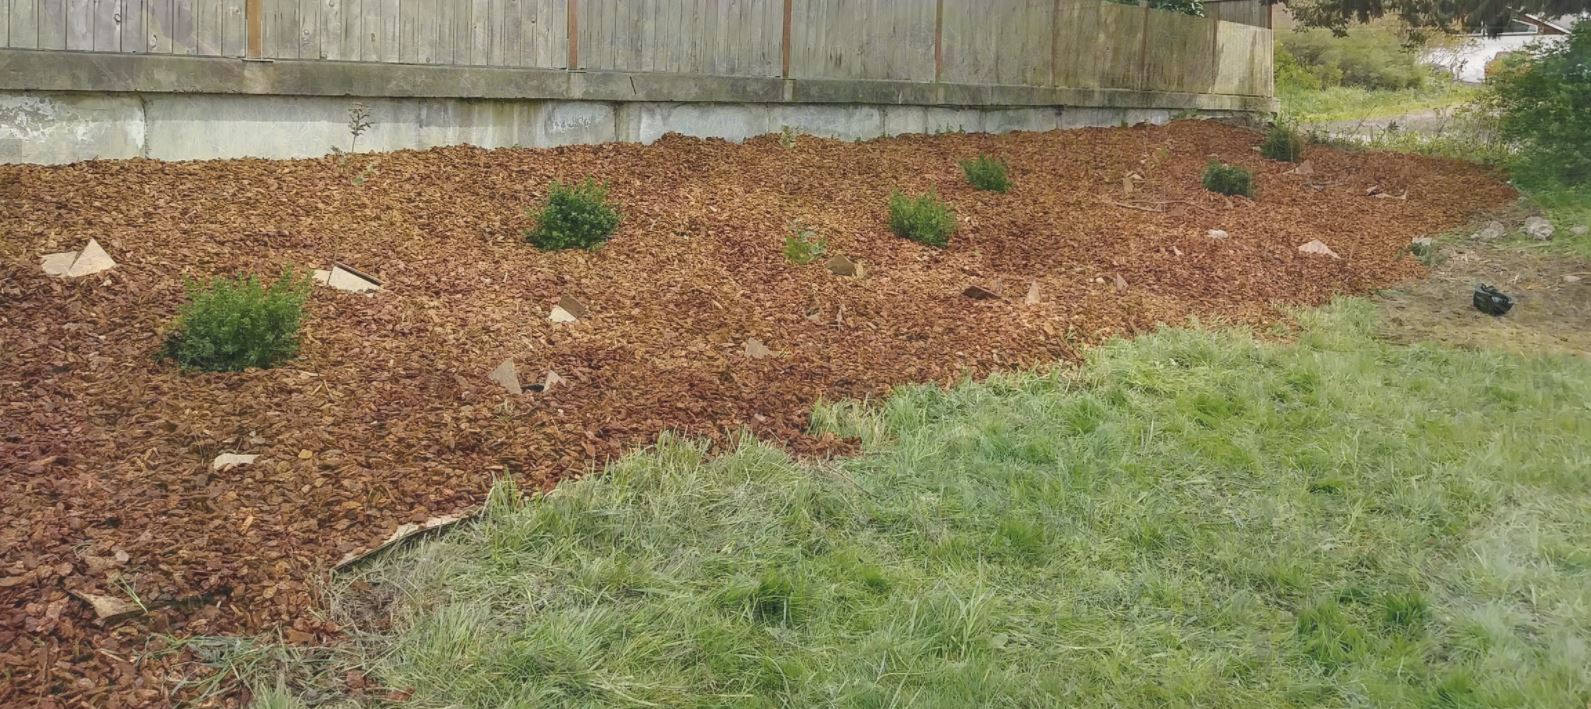
Still fighting all the invasives, but we are also implementing more trees & shrubs. Progress! Year 4 Every year we start in the early spring with more cardboard - a truckload of it!! Otherwise, all the work from the previous seasons gets nullified, and all the plants & shrubs will get overtaken. LOOK how it's thriving in year 4!!
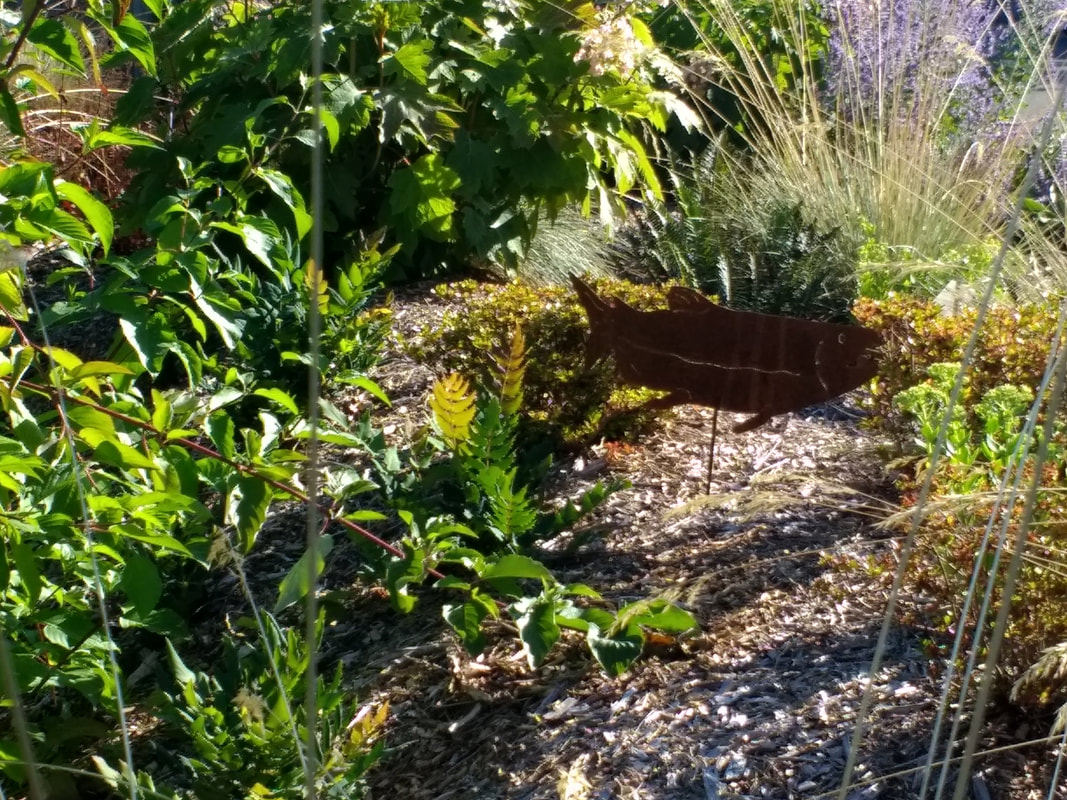
  Do you have a Salmon habitat? Find out with the fun map below!!
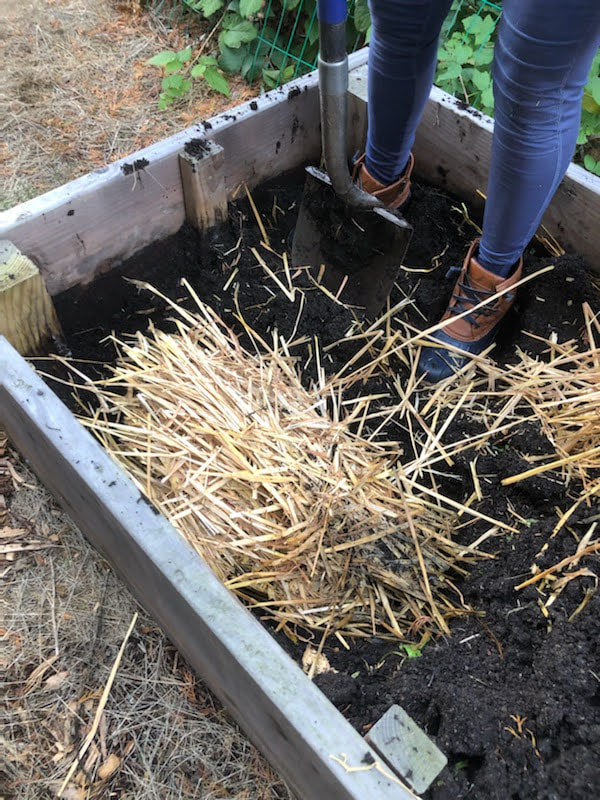
 Puget Sound, as shown in SalmonScape, a GIS-based interactive map  Many People use fillers in raised beds to avoid having to fill the entire box with soil. Filler materials can be gravel, pottery shards, packing peanuts, or even plastic bottles. But don't use these, use straw!!
Fill the beds 2/3 with straw. Then put 6-10 inches of compost-rich garden soil on the top. Filling raised beds all the way up is wasteful, and the plants don't need that much soil. Plus, it takes a LOT of water to saturate all that soil every 2 or 3 days, and that is expensive! 
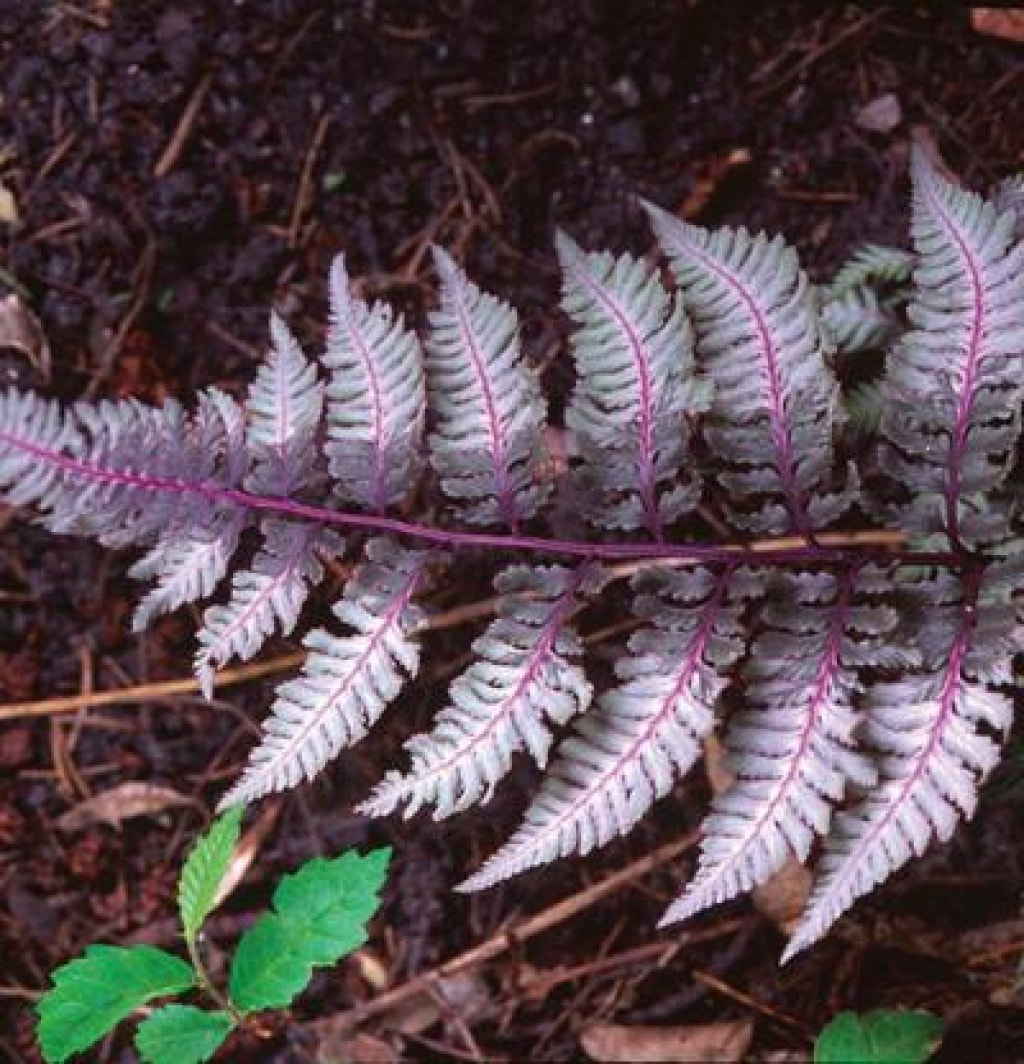
 My Favorites!!SHADE The lovely Maidenhair Fern 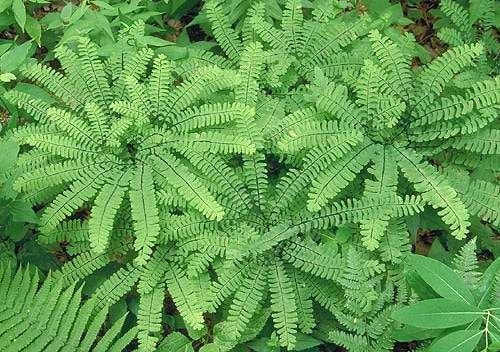
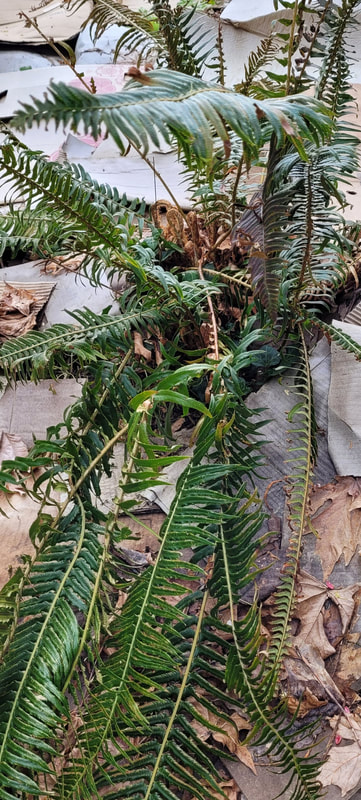
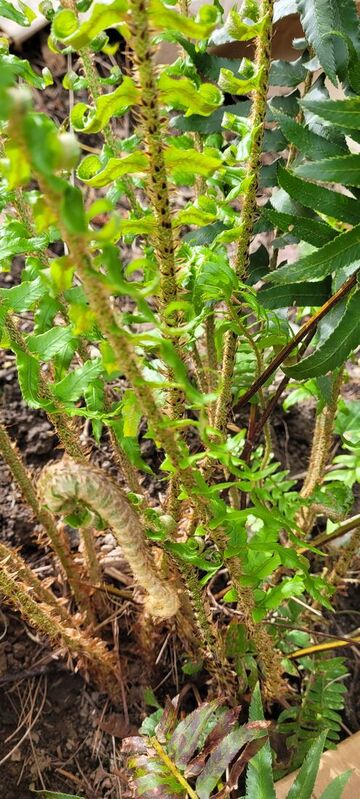
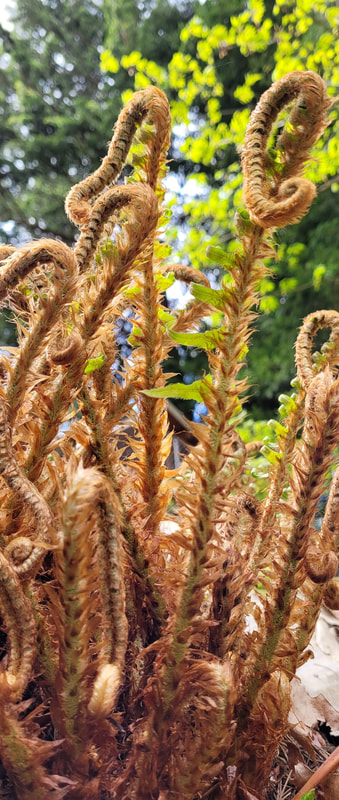
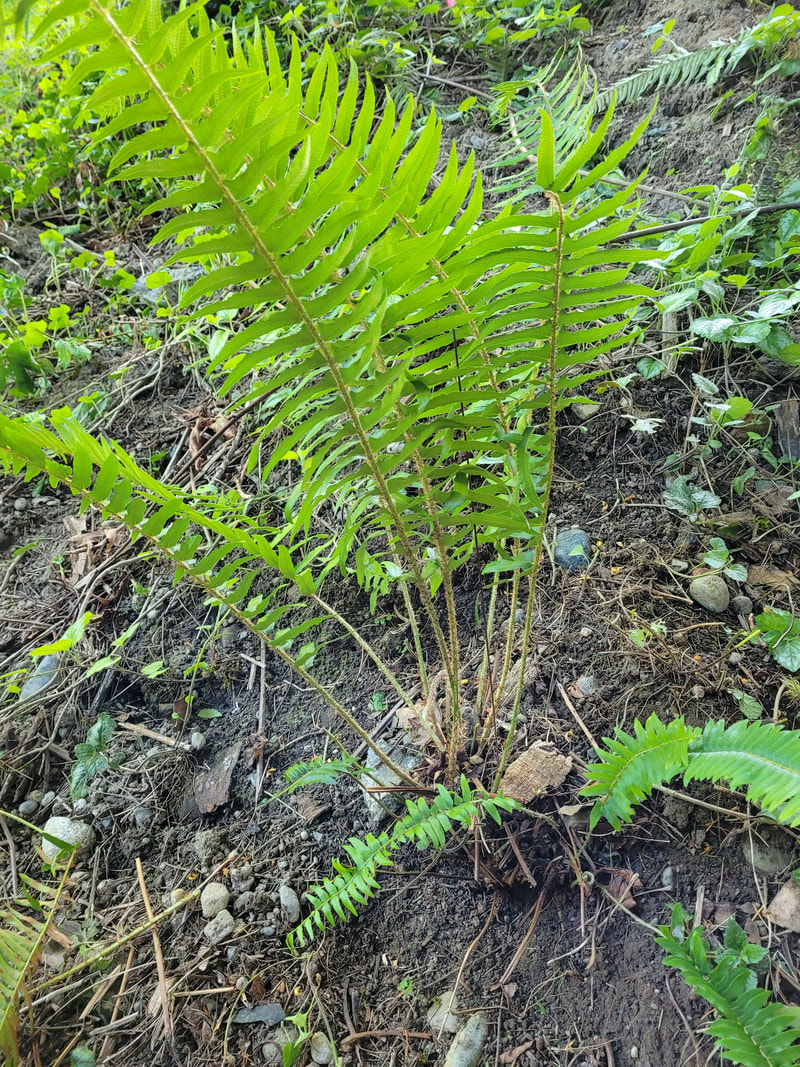
Pruning Ferns
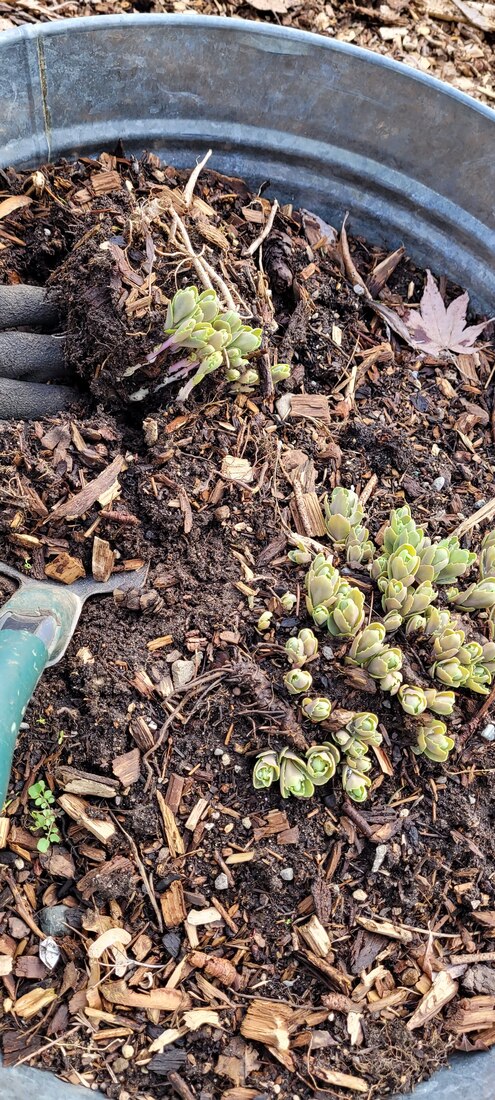
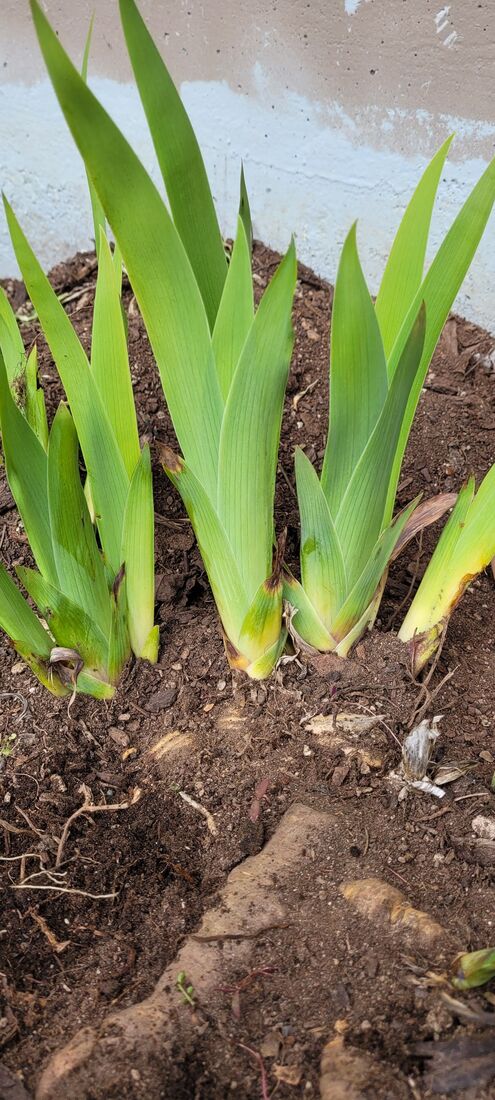
Divide these plants to fill in landscape gaps!!Echinacea, Succulents, Autumn Joy, Iris, Shasta Daisy, Bee Balm, Hen & Chicks, Hosta, Grassy Plants, Rhubarb and more!!! The best time to divide plants is in the early spring, just as they are emerging from roots or rhizomes, or when the snow is over and it's warm enough to work outside!
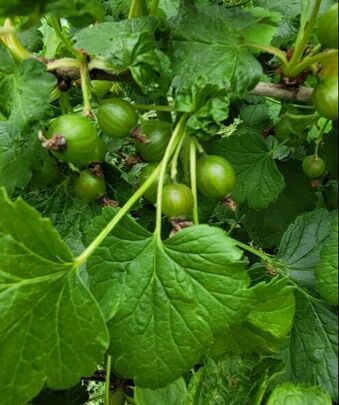
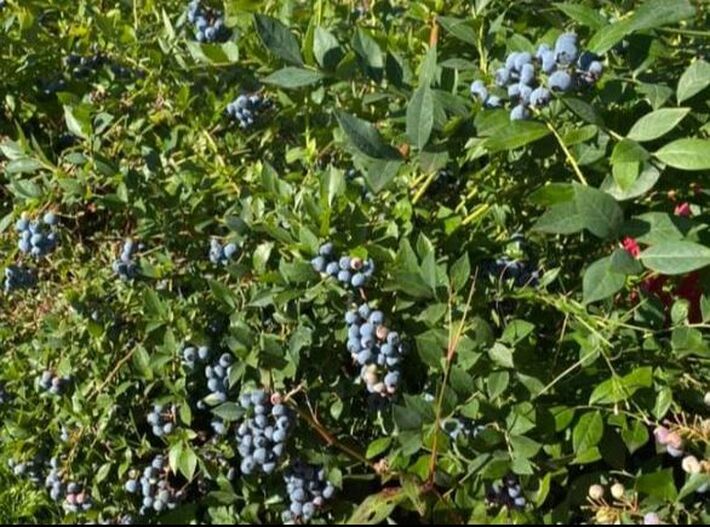
Blueberries in an Edible Landscape!What a fun addition these are to any garden or yard! Easy to grow and a handy snack!! 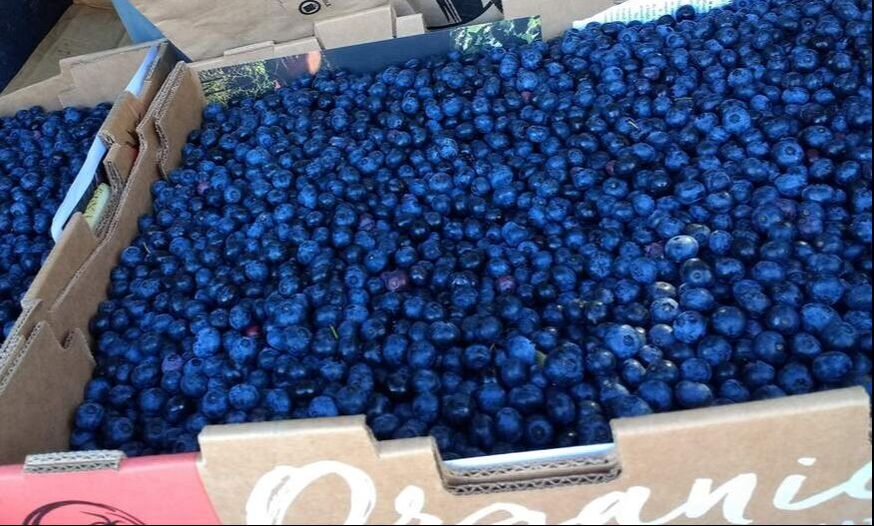
 Fertilizing Also Helps. Spring Care:
BEFORE AFTER Pruning Tips:
You can grow Blueberries in a pot!
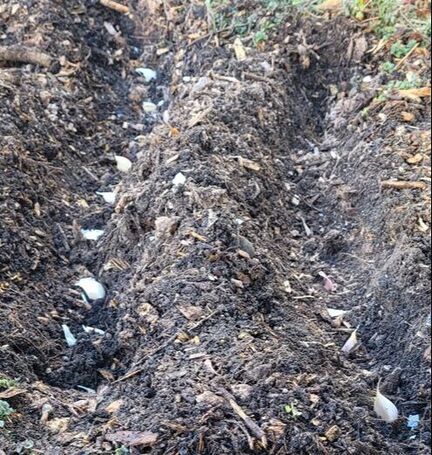
 What and When can I plant? As the winter storms lead to a few brighter days in January, I start seeing the sun again, if only briefly. But it's enough to make me start thinking of gardening. The temperature today is 25 degrees F outside. Winter flowers are blooming, bulbs are poking up, and my kale is still growing. Can I still plant garlic? I would definitely plant garlic!! In fact, I have garlic going all year long! The "customary" timing is to plant around the beginning of October and harvest on the 4th of July. . . . . or there about. The goal is to get the garlic roots established before the freeze comes, which gives the bulbs a jump start for spring growth when the weather warms. But, you can adjust. I say plant it when you remember. Just know that garlic takes about 9 months to maturity. Easy to remember, haha It's very easy to plant. Root side down about 2-3 inches apart in a 4 inch deep trench in well draining soil. If it's the hard-neck variety, you'll have long twirly garlic scapes before harvest time that you can cut and use in a stir fry. Bonus!!!
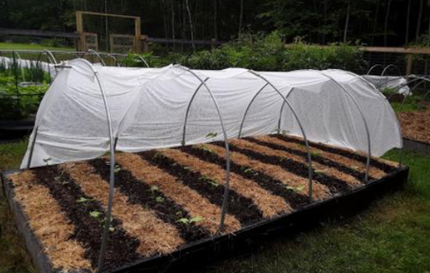
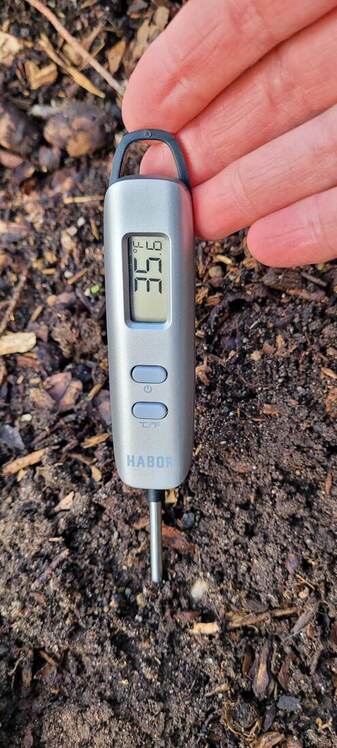
Is it time to start seedlings? For years and years I joined the tribe of "early planters." Some of my seedlings occasionally did well enough to grow in the garden, but they struggled and didn't produce much. I didn't know how "they" did it. Then, when I started asking the plants what THEY wanted, I started doing better. THIS is the importance of soil temperature:
We are successful gardeners when we can adapt to
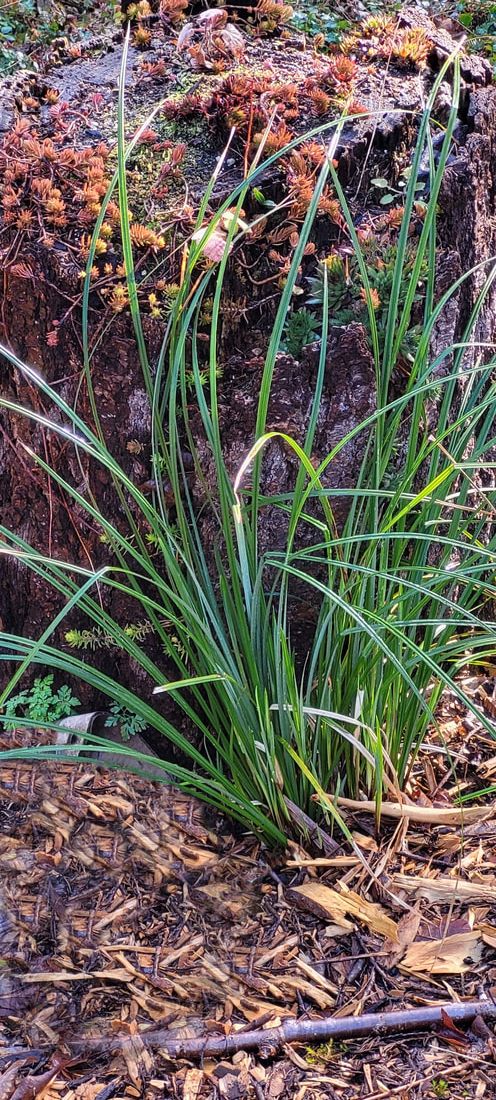
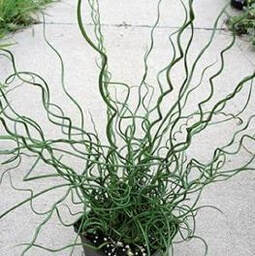
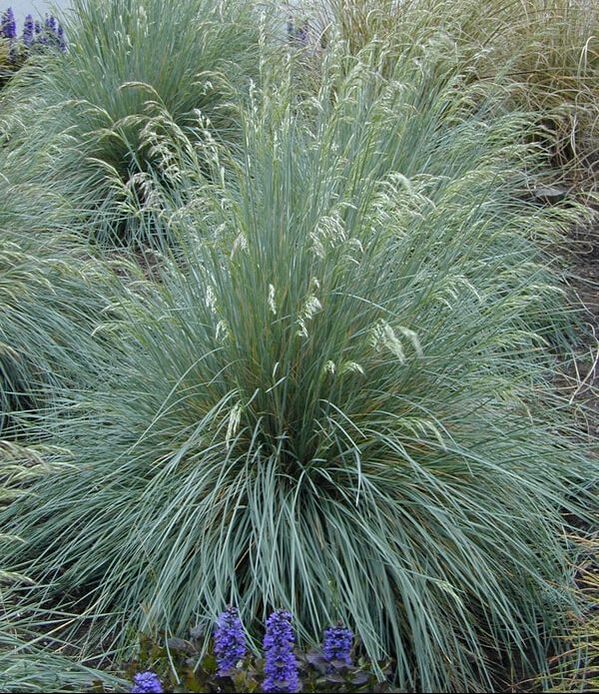
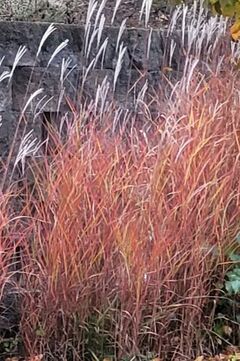
the ever-changing climate of the Pacific Northwest! Pampas Grass - The King of Grassy plants,! This showy display in the late fall gives color and animation to an otherwise dreary season. The colorful plumes sway in the wind and later disappear to expose the large evergreen mound until spring arrives. The stately appearance of this fast-growing plant can get quickly out of hand in size, growing 10-15 feet tall and spreading 6 to 10 feet wide. This is perfect when used on a border or as a main landscape feature, but will become impossible to divide or move without a backhoe, so choose the location wisely. 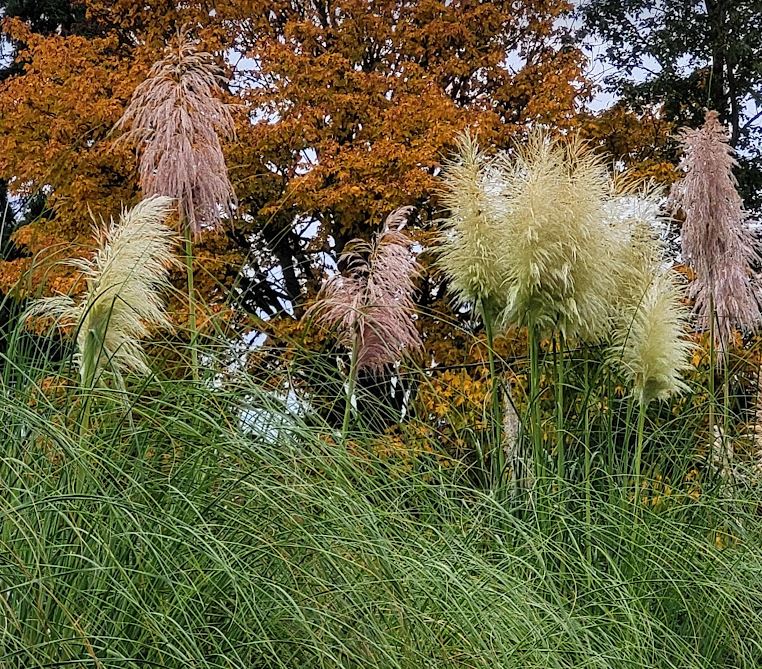 Plant Sedges in wet areas - great for a Rain Garden!
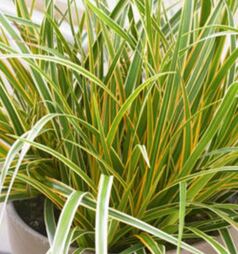
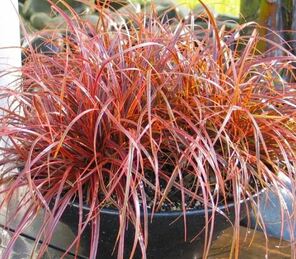
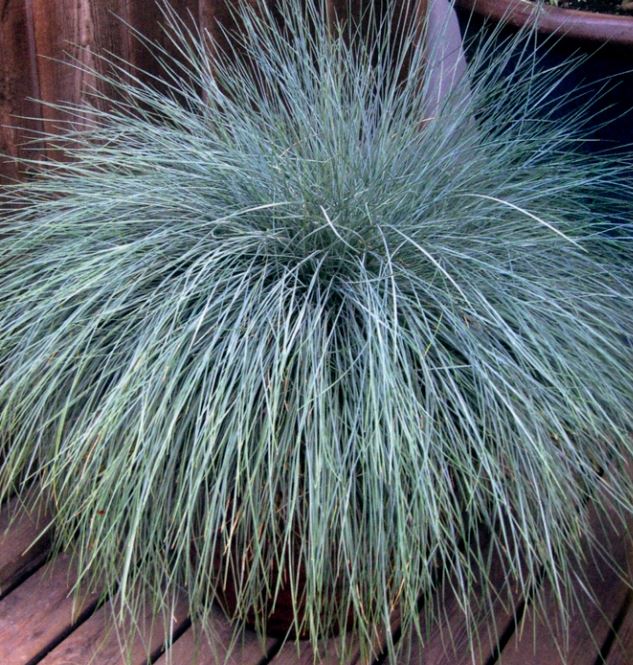
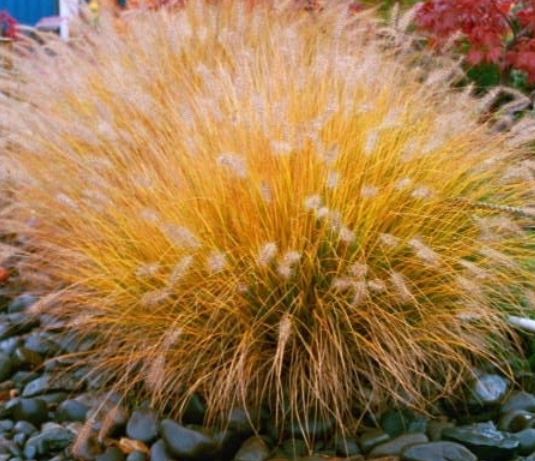
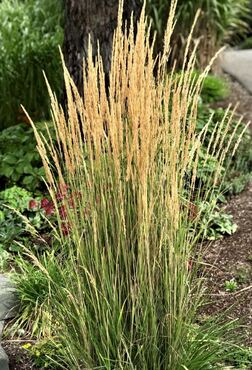
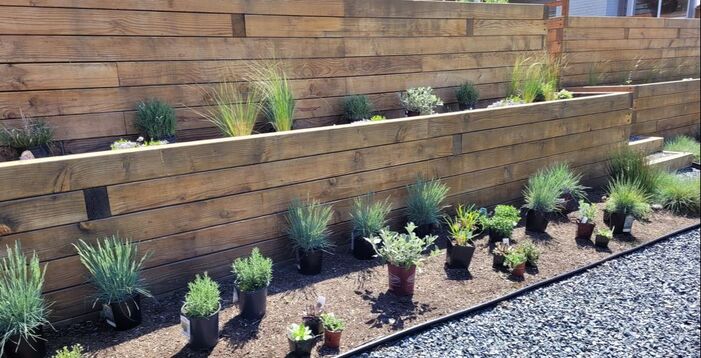
Drought-tolerant additions for a resilient landscape! Accent with these perennial grasses to add texture and color year-round!
Too many people trim their grassy plants during fall clean-up - potentially killing them.
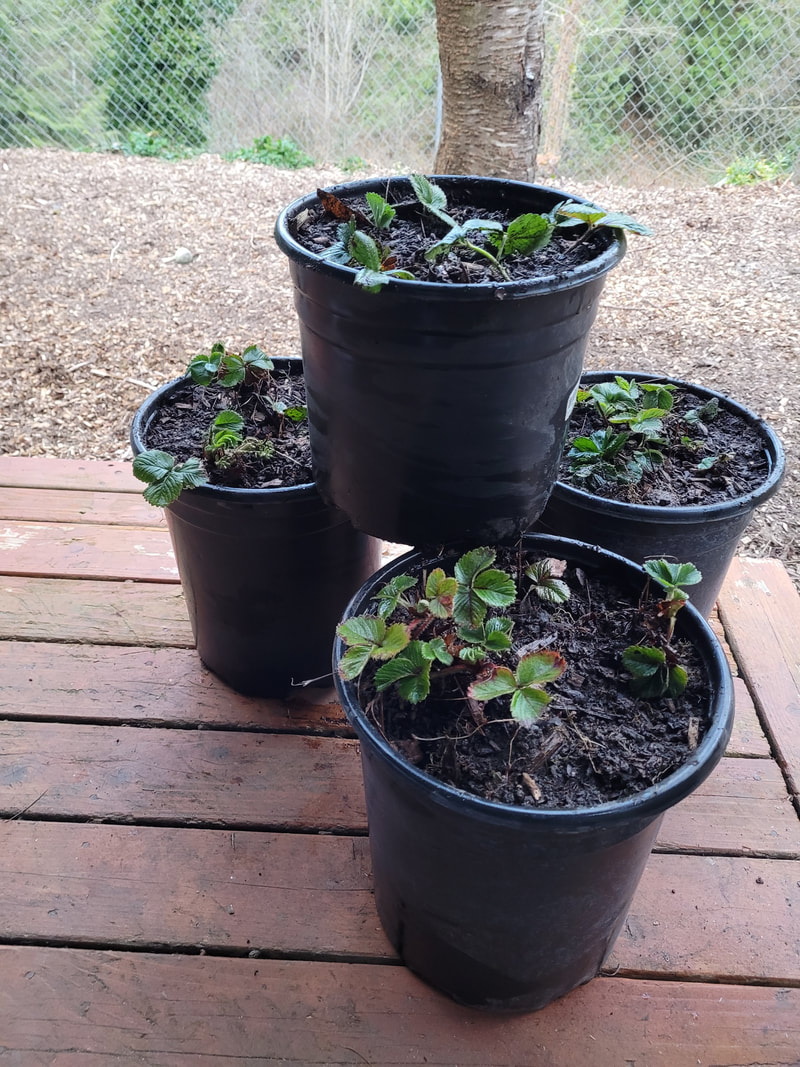
Prune perennial grasses in the Spring! What is a Microclimate? Microclimates come in many shapes and sizes. A comfy chair hidden under a tall canopy of flowery shrubs, or a black plastic pot in which to grow strawberries! You probably have many of them in your yard. So, why do you need them AND how do you find them? 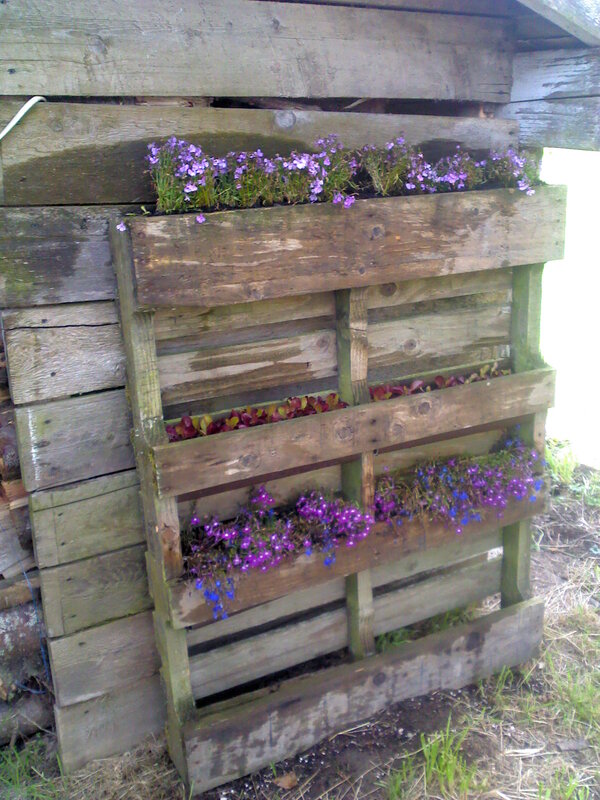 For a home landscape, microclimates can range from small, planter-sized areas to large buildings or long rows of tall trees. They can be a specifically designed environment or a naturally occurring buffer. Microclimates can create shade, heat, cooling, wildlife nesting areas, protection, moisture, beauty, and other benefits. Some common features to look for in your yard are:
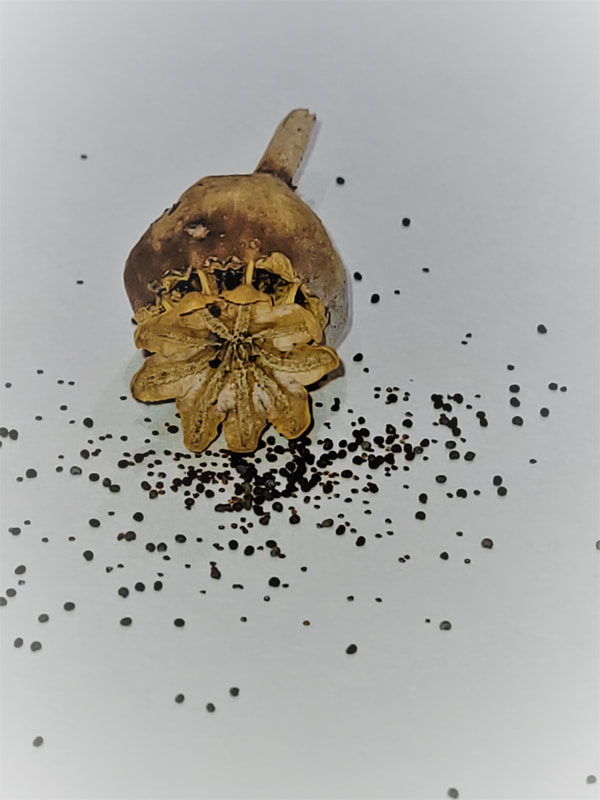
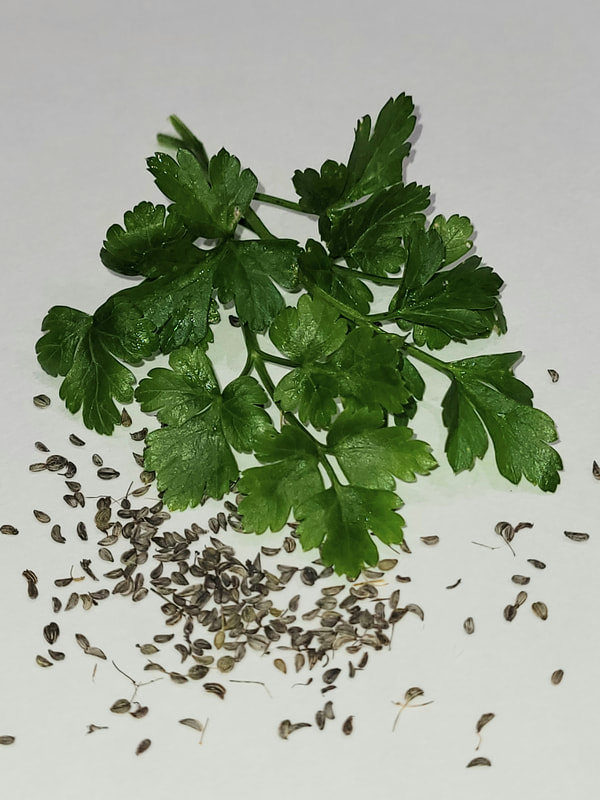
Have Fun! Swap, Buy & HarvestSeed Options Three main types of seeds are available to gardeners.
Open-pollinated means that the plant flowers are fertilized by bees, moths, birds , bats, and even by the wind and rain. The seed harvested from these plants produce the same plant the next year. Some variances can occur if the plant is cross-pollinated by a different variety nearby, but this also adds to genetic diversity. More diverse plant populations can adapt to local growing conditions and changes in climate year-to-year. Heirloom seeds have a documented history of being passed down from generation to generation in a family, community or tribe, that have not been cross-pollinated. The plants grown may need a little extra care, but are said to produce more flavorful and more nutritious food. Heirloom tomatoes are especially popular because of their deep rich flavor, and the seeds can also be saved to plant more of the same for the next season! Why Organic?? The simple answer is that synthetic pesticides, herbicides and fertilizers, that are used on crops, including crops for seed, are unhealthy to consume. These chemicals cause illness, and are linked to many illnesses, cognitive degeneration, learning disabilities, memory loss and cancers. When crops are treated with these toxins, the food we eat also contains them. So, I vote Organic. The "Organic" designation requires more government oversight relating to certification and growing standards, transportation, and production facilities. The increase in the cost of this "cleaner" produce is a small price to pay for the commitment by smaller farms and farmers, who believe that food grown in it's natural form and habitat provide our bodies and our families the best possible nutrition. And I stand for these practices. 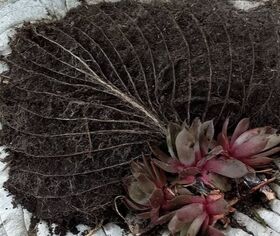 Biodiversity is the perfect balance.
Crop health & production improve exponentially in a biodiverse environment. This is why monocrops grown from hybrid seeds require so much synthetic fertilizer. All the nutrients & biodiversity are gone. See this AMAZING example of the benefits of biodiversity on the barren landscape of the Dead Sea www.youtube.com/watch?v=goBB4fVLRxc Ecosystems are biodiverse communities that include all the different kinds of life you'll find in one area. These species interact and create an ever-expanding energy storage system that form an intricate web, to maintain balance and support all life.
Becoming a seasoned & intuitive gardener takes years of experience....True. However, anyone can be a successful gardener, if you are committed to it. In the beginning, you can gain experience and success by keeping your vision small. TRUST ME ON THIS!! Start with a 3x3x3 method. Plant 3 hearty vegetables that you like, 3 perennial flowers, and 3 ground covers. This is everything you will need to start building a sustainable and resilient landscape.
What's your soil type?  An experienced gardener can go crazy trying to get the *perfect* soil mix for their gardens. From making your own compost to buying the ideal mix, one can spend either an abundance of time, or a whole lot of money. And if you're dedicated to growing food, you really need to have soil that works for vegetables. This quick field test will help you determine your soil type. Knowing this is imperative, as it gives you information on your soil's water holding & draining capabilities. 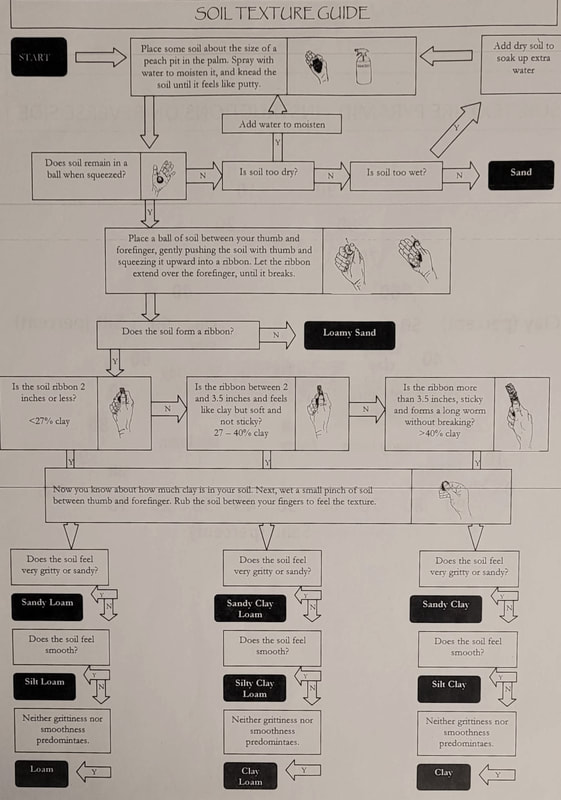  Do I make my own compost? YES
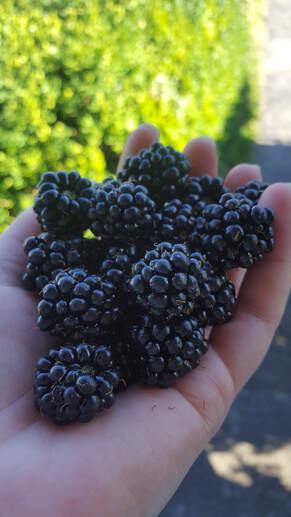
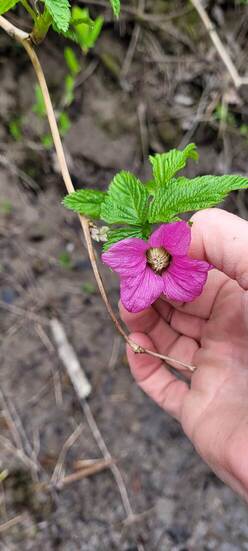
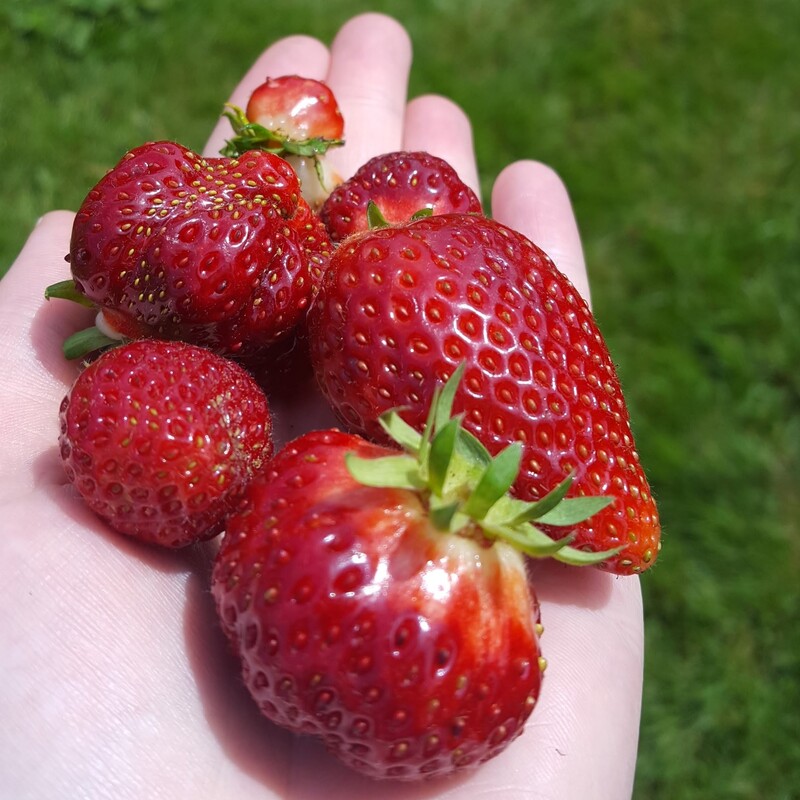
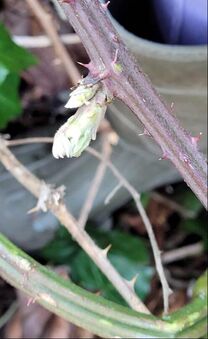
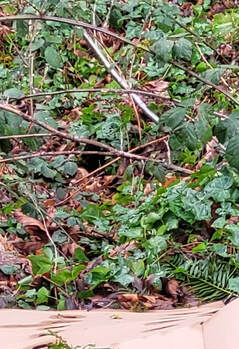
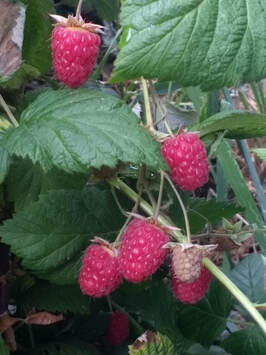
But if you're just beginning, skip it. What you're looking for is well draining, rich in nutrients, and fluffy. I suggest a triple mix - and here's how I make it. 1/3 - Your regular ground soil, whatever it is. It's best to screen it to remove all weeds. 1/3 - Organic potting soil. This usually contains a small amount of slow-release fertilizer. 1/3 - Organic compost. I find the bagged version is cleaner than in bulk, but I'll let you decide. I mix this altogether in a wheelbarrow (in batches) and use it as I plant. If you decide to get bulk "garden soil" for your beds, BEWARE. As you look at the choices, make sure to scoop some up to make sure it has the feel you want, plus the right combination of the 3 elements from above! Happy Gardening! Luscious Food from Sprawling CrawlersBlackberries, Strawberries, & Raspberries........... Ahhhh, the taste of summer! These delicious berries are prolific in the Northwest, and the many varieties and cultivars make harvesting them a summer-long treat. It's almost hard to believe that these wild brambles and creeping vines can produce such luscious fruit. We look forward to this so much, and don't have to do much planning to get them. And why should we? They take little effort to grow and come back year after year! The downside is their growing habit. They can quickly take over vast areas of bare ground, and can be somewhat difficult to tame. Here are a few ways I handle them, to increase harvest, and minimize effort. BLACKBERRIES
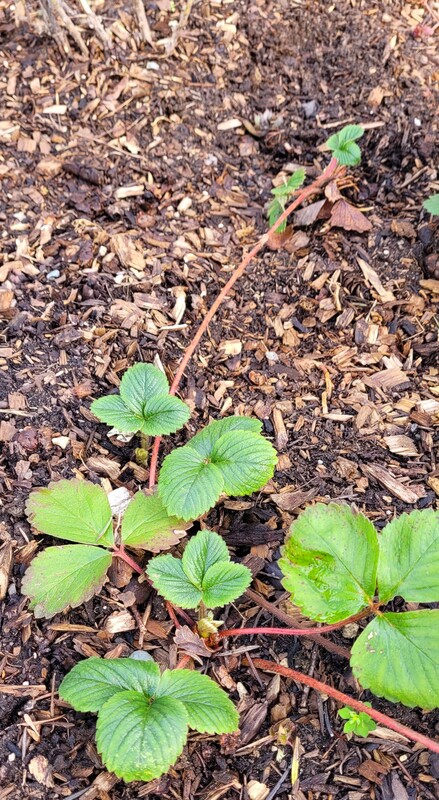
TIP You can shape the area as they grow, or just let them form into a mound where the berries will be abundant and easy to get to when they ripen in the fall. STRAWBERRIES I like to grow strawberries in pots with the Tier Method. The black pots serve as a heat-sink, absorbing heat during the day and releasing it slowly overnight, keeping the soil warmer longer. The berries ripen faster, PLUS it's a great way to minimize slugs & keep other predators at bay. When the runners start to spread, I put them into one of the adjoining pots, thereby creating an above-ground network of strawberry plants, that produce wonderfully and consistently for the summer. The "mother" plants are viable for 3 years, so to keep your patch going you'll want to separate some of the "runners" which will become the "mother" plants. TIP Pots get warm & dry, so keeping them watered will ensure the red berries keep coming!! RASPBERRIES RED & GOLD TIP Prune June-Bearing plants after harvest, as these will fruit on OLD wood next season. Everbearing plants fruit early on old wood, and again later on the newer spring growth.
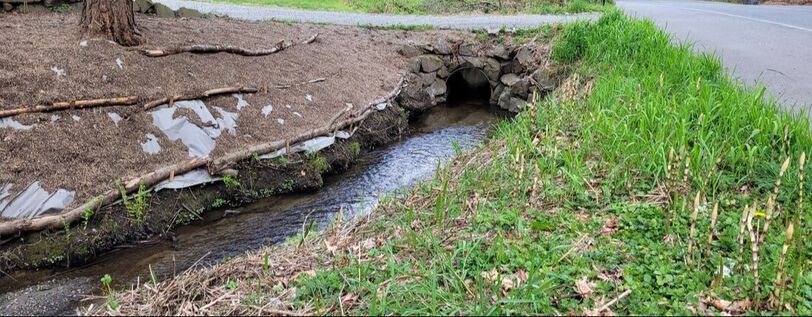
Why do you garden?
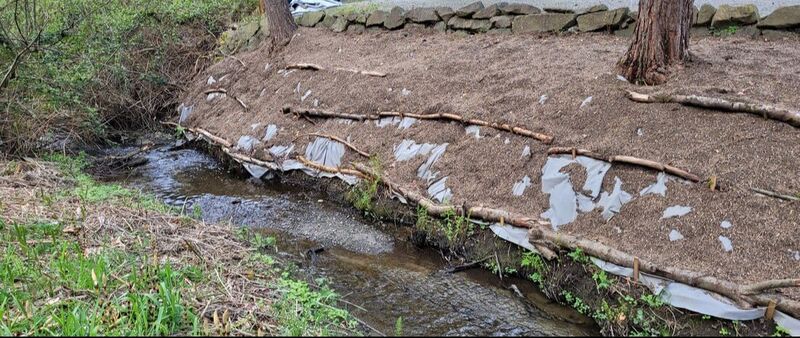
Every day I have a new answer to this question. That's because every time I go out to look at, and work in the garden, I see something I haven't seen before. A new wildlife visitor (or pest), a budding bush, or a fully opened flower with a sweet fragrance that makes me linger. I feel beauty, I feel peace, I feel connection. What makes you linger? I invite you to comment, participate and question Everything, so we can learn and grow together! I'd love to hear what you think! With Gratitude, kathy 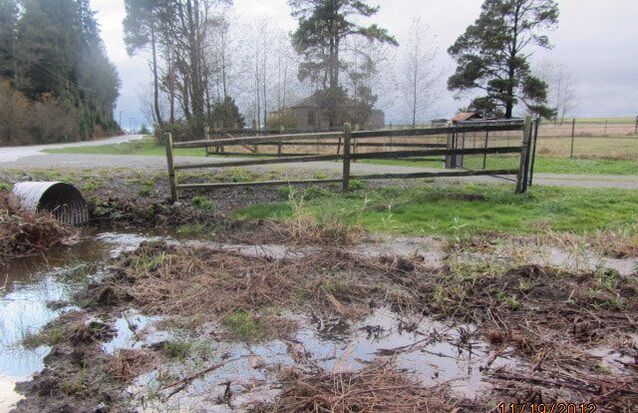 Ideally, water that falls from the sky would go into the ground and nourish the plant life. The perfect balance. However, this is increasingly rare, especially in cities. As populations grow, construction methods are such that ground clearing removes the porous layers that would absorb surface water. Piping and ditch systems are created that “collect and send” water to another location. In storms, these systems become over-taxed and cannot handle the volume and flow of water. Flooding can, and frequently does, occur. Rural areas are better, but compact ground, hilly terrain, clay layers and subsurface hardpan keep water from infiltrating into that ground too, the result being mucky muck in the winter and hard-as-a-rock clay in the summer. Neither allow water to infiltrate. To get the water into the ground is to make the ground more absorbable. A very popular, inexpensive and relatively easy way to do this is with recycled cardboard. Cardboard works because it prevents photosynthesis so weeds don’t grow, it helps absorb & retain moisture, and the cardboard decomposes and adds ‘fluff’ to the hard ground, making space for water to ‘go in.’ I have used this method for more than a decade, in muck and clay, with great success. Here’s a really good example of how to do it. This Sheet Mulching example is courtesy of the Snohomish Conservation District A beautiful summer day in the Pacific Northwest!  But I was sick, and I had no idea it was dehydration, or what that even was. I was 30 years old, and it was late July. I had been gardening and running around planning for a large family picnic. I had two very active little kids that liked to play outside in the dirt (haha - go figure!!) It was hot outside, and I had been feeling a little dizzy for the last few days. Whenever I ate I felt sick, and I had stomach cramps that wouldn't go away. I felt nauseous and hungry, but all I could do was lay around and try to sleep. My husband looked at me and said he was going to take me to the hospital. SHOCK! What? Why? I was just tired, overworked and stressed out, I thought. As a last resort I grabbed a medical book and started looking up my symptoms. I found this formula and wanted to try it before going to the hospital. My husband said I had one hour. I made this recipe and, since I was desperate, I drank 1/2 cup every half hour. I was in disbelief that after an hour I felt much better. In three hours I felt good, and after another recipe, I ended up eating later that evening and didn't have to go to the hospital. I though it was strange - but I found out it was dehydration. Don't let it get this far - it's dangerous. The stomach cramps is a clue for me every time. The drink doesn't taste very good, but if you drink it hot, it's better. I have used this recipe for years and years because it works!! AND, it won't hurt you if you're not dehydrated! 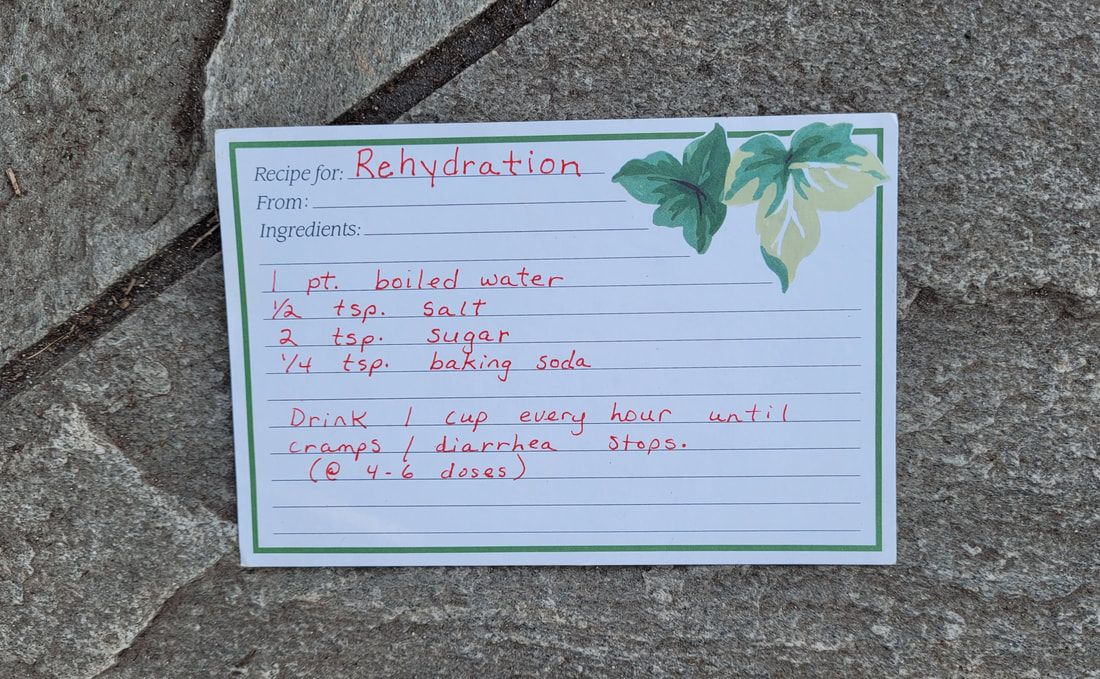 Are you washing your food? I used to eat leafy greens right out of the garden. Carrots too, after I washed them off with the hose. But in the last few years, since I have been working with, and in, a lot more gardens, I've started looking at the plants a lot more closely - as I teach others to do. After all, observation is the first thing to do when working with any landscape. When labels say "Organic" I believe there is an assumption that the produce is clean because, after all, it's grown without chemicals, right? The arguments here can vary greatly, but the bottom line is that we all want the fruit and vegetables we eat to be free of bugs, dirt, chemicals and bacteria, period. This Fruit & Vegetable Rinse, made from corn & coconut, is hands-down the best food cleaner I have ever used. It's edible, so you don't have to wash it off, and it's safe for kids & pets. It extends the shelf-life of your produce, and kills 'bugs' inside your body; I used it when I got food poisoning and was better in 15 minutes! It kills aphids on plants, and fleas on pets too. Read about it for yourself. Fruit & Vegetable Rinse
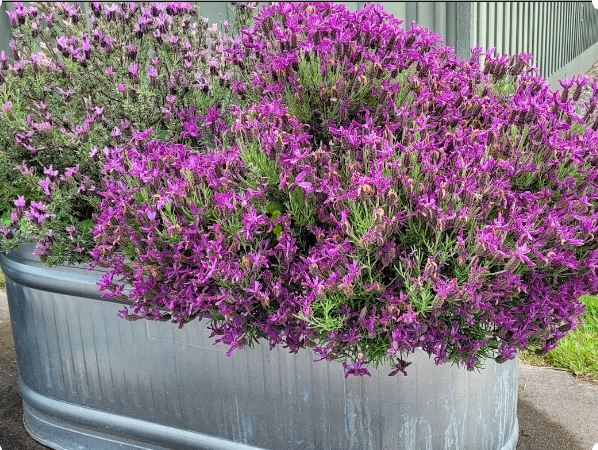
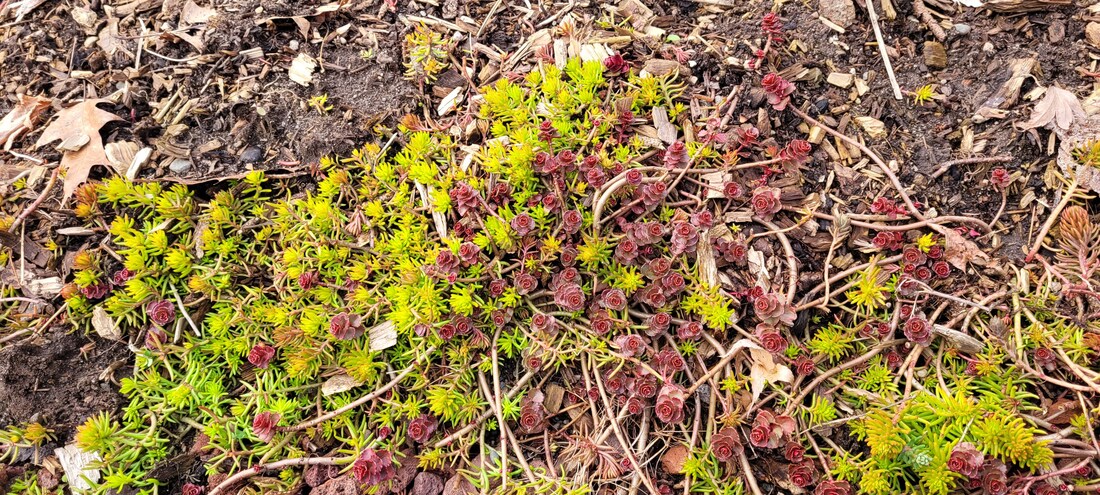
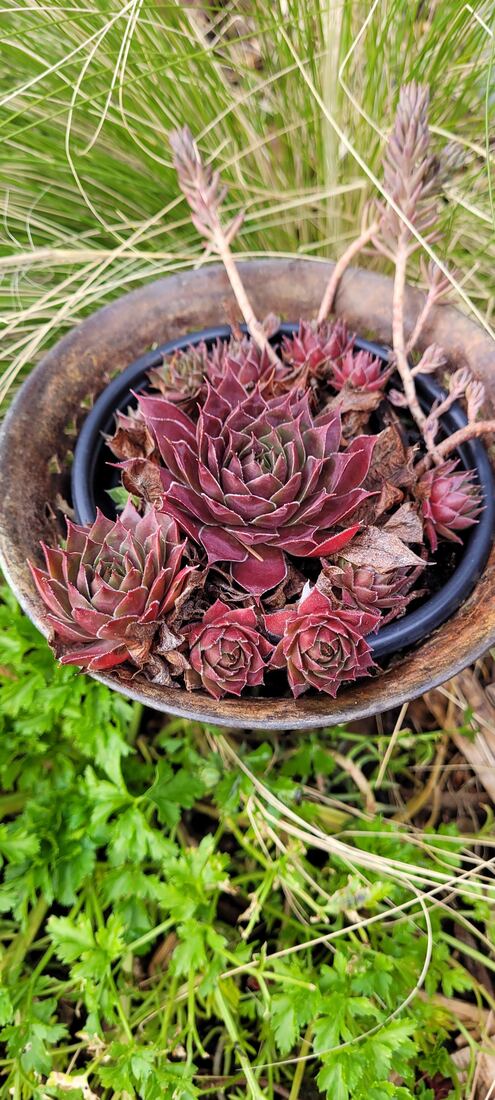
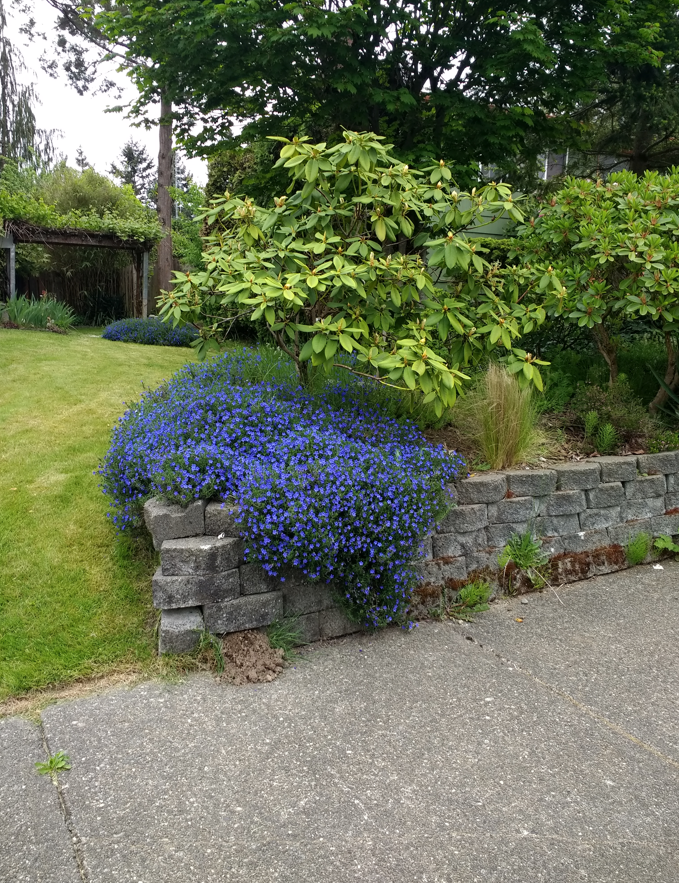
Whatever you do, DO SOMETHING to clean your food, counters, car and house. Do it for Health, and for Peace of mind <3 Succulents are the easiest, most resilient, prolific and beautiful plants for Pacific Northwest Gardens. If you have them, you know this!! These low-lying plants grow wonderfully along garden pathways or rock walls, needing little attention. The intermittent summer rain squalls are enough for them! They present with bright flower spikes in early summer and can even change color with late summer heat. *Bonus* 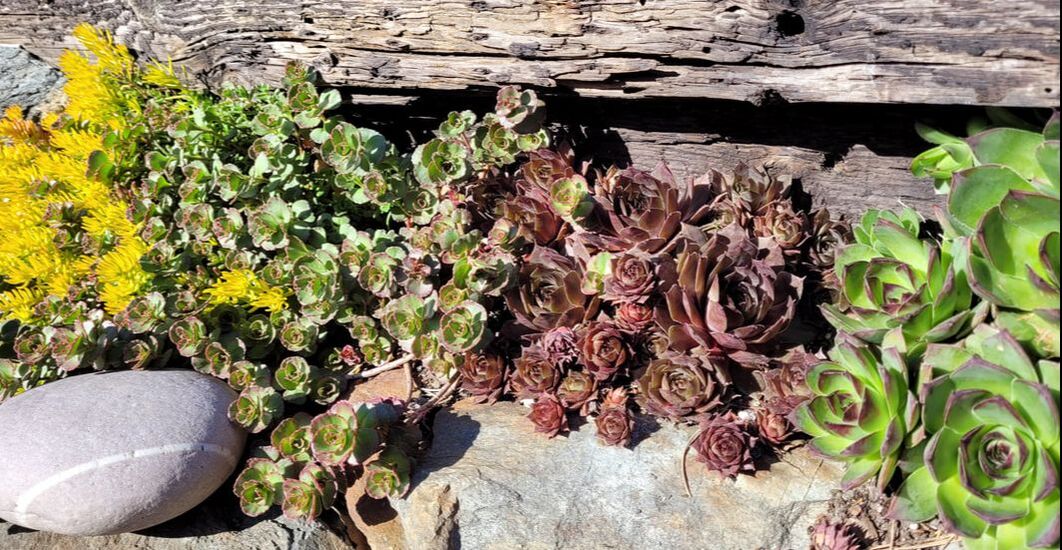 Succulents DO NOT like to be separated, or planted as individuals. They like to be clumped together! This is how they propagate the best. Most prolific growing is in the early spring, where you will see explosions of new "chicks," while at the same time seeing a bit of the "mother" plant dying off.
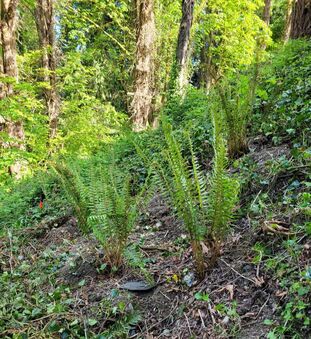
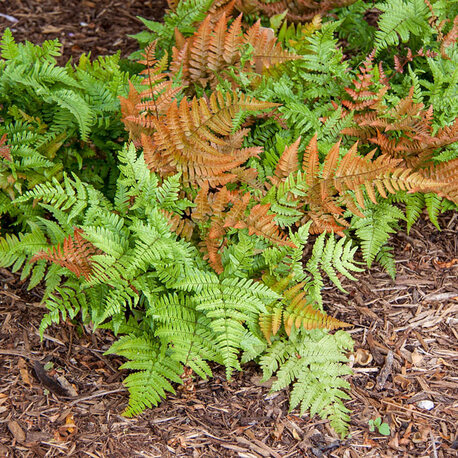
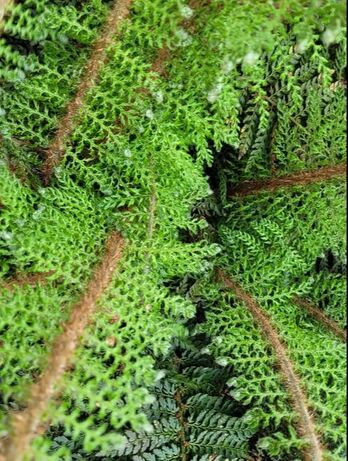
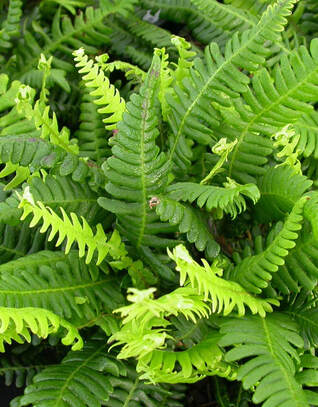
I really love to use ferns in the landscape! They're versatile, abundant, inexpensive, and quite beautiful with their spikes of bright green, grayish-purple and orange. They can grow BIG or small, as with all plants, depending on how much they like their environment! These are a few of my favs! And here's a few pruning tips! 1. Healthy patch of our native Sword Fern. It's clearly 'picture perfect' and all the dead fronds have been clipped away.
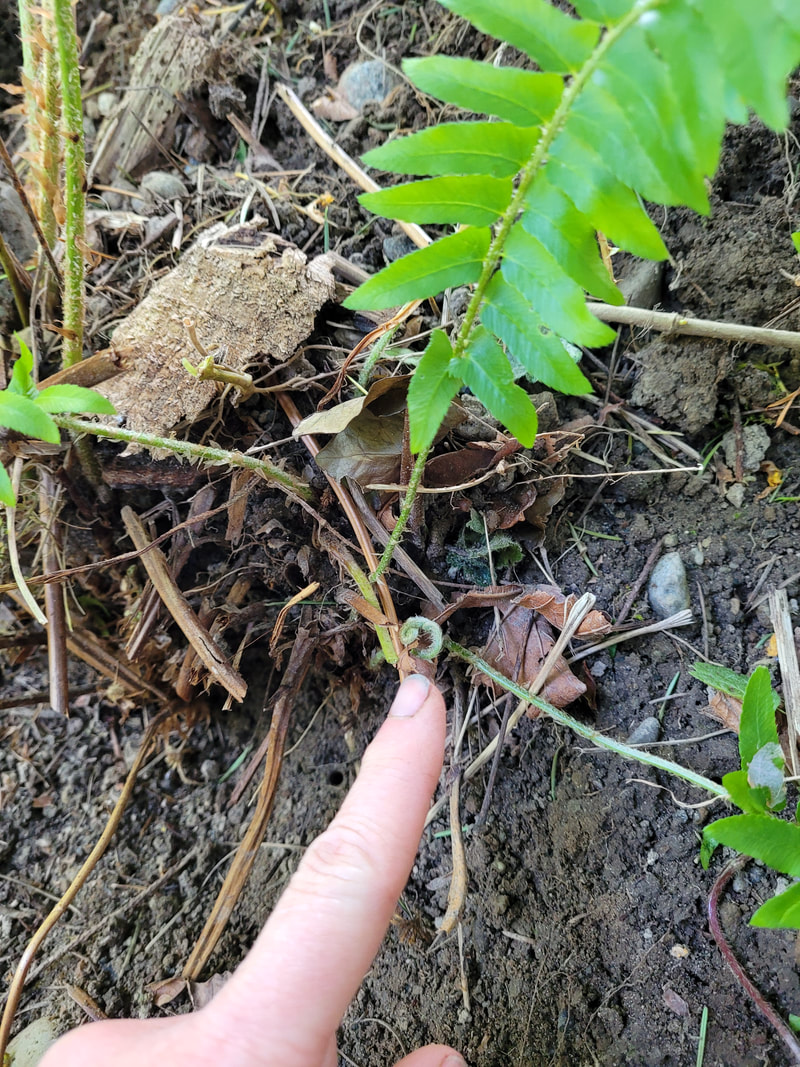
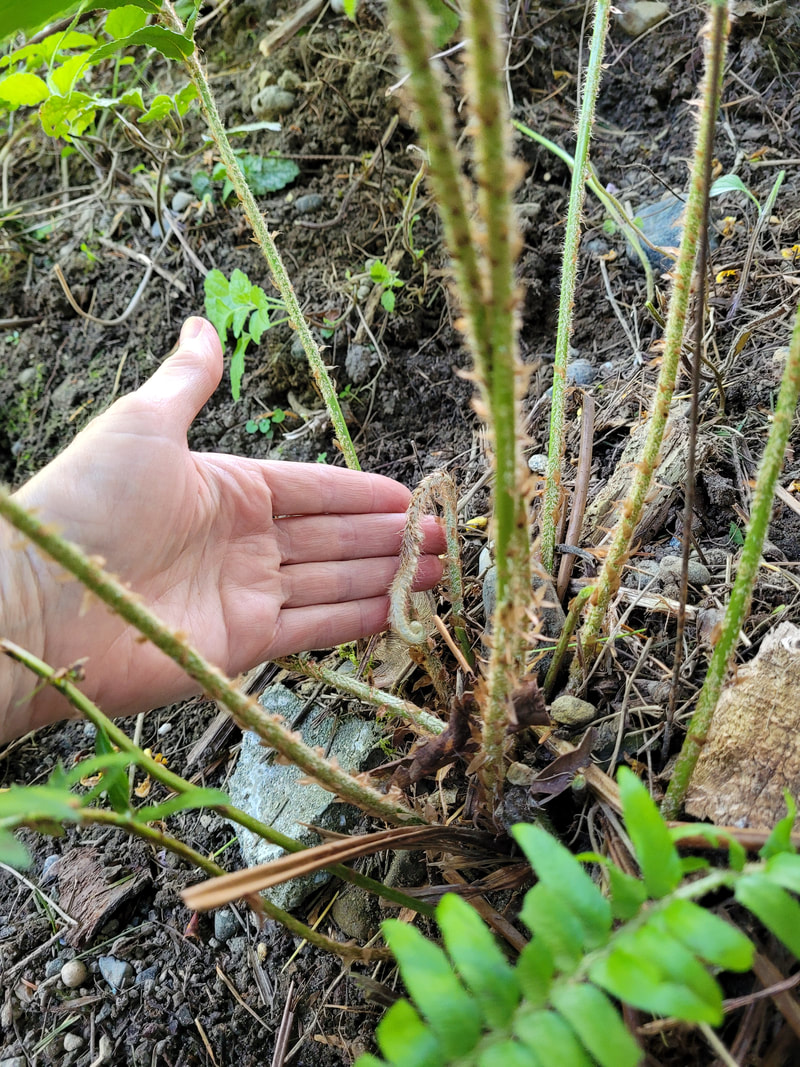
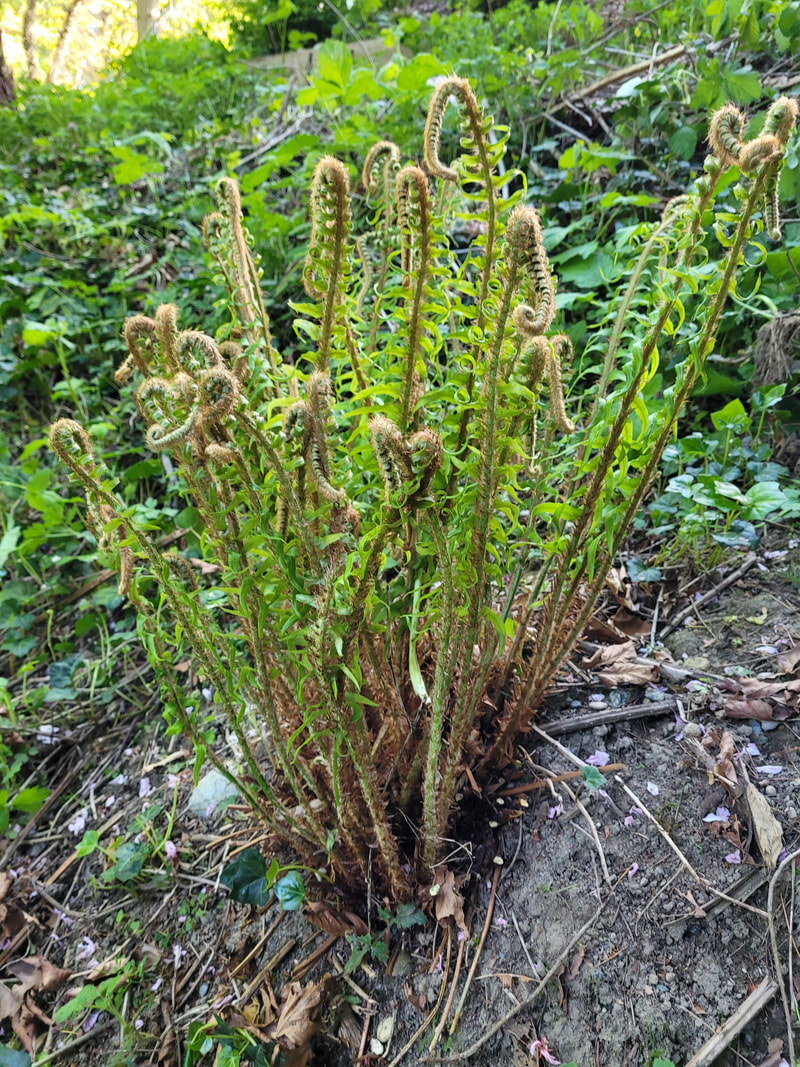
2. Here's how mine look in the spring! 3. First, I look deep inside to the middle of the plant to see if the new fiddleheads are emerging, and I'm careful not to cut them off when I prune. 4. Then, I pull back all the OLD fronds even if they are still a little green AND I cut them off all the way to the center. Yes, all of them! 5. This allows light for all the emerging fiddleheads to unfurl! 6. It is such a lovely sight to see the tiny little pruned fern transform into a bright green lush plant in the early spring! DO Experiment with different ferns in your landscape! Some are more sun-tolerant than others, but a good filler plant nonetheless!! **As always, if you want guidance, Please contact me** |